1. To insert an existing custom field into your magic document, you can follow these steps:
- Add your magic document.
- In the Prepare tab, scroll to the line or area you would like to add your field.
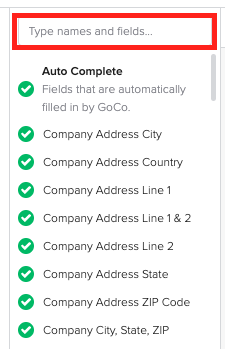
- On the left-hand side of your screen, search for the title of your existing custom field, then click on it to insert it.
That's all! Now you have a read-only field that will autofill whenever this document is in use.
2. If you need to add a fillable field for a Document Assignee in your Magic Doc, follow these steps:
- Add your magic document.
- In the Prepare tab, place your cursor where you want your document-specific field to go.
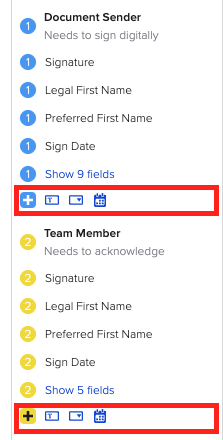
- On the left, locate which document assignee you want to add the field for & hit the '+' sign to select which document-specific field you need.
3. The option to customize will populate to the right of your screen and you will click the gear ![]() button to adjust the field - for example, you can-
button to adjust the field - for example, you can-
- Change Field Name
- Add Description
- Add Default Values
- Choose to make this Required or Optional
4. Once you complete the fields to create your field, click Save and ta-da!
*For Field Type you can choose either a Text Field, Dropdown, or Date Field if you upload a Word document. If you upload a PDF document you can choose Text Field, Dropdown, Multiple Choice, Date Field, or Checkbox.
Wondering the difference between those fields?
- Text Field - gives space for the person who completes the field to type in the value
- Dropdown - creates a list of answers from which one can be selected
- Multiple Choice - creates a list in which one (radio list) or more (checkbox list) can be selected
- Checkbox - allows for the completer to mark the field as checked or unchecked
- Date Field - allows for the admin or the employee to select a date from a calendar (hint: after clicking on the field you can adjust the format of the dates on the right side menu)
⚠️ Please Note
Document custom fields that you create within a document are not saved in the company profile or employee profile. These fields are not reportable.
If you would like to save this information to your employees profile, you may want to collect this with a Custom Field.
Company custom fields are created on the company level. These are saved in the company profile and employee profile. Additionally, these fields are reportable. Check out this article to learn more: How Do I Create a Custom Field
Please email support@goco.io with any other questions 💚