After following your initial steps to Create, Name, & Categorize your document, you will select your Document Assignees. This is who will be involved with this Magic Doc and their level of interaction with it. You can assign actions to the Document Assignees such as collecting digital signatures, acknowledgments, and receiving a copy of the document (see below for definitions).
- Needs to Sign Digitally - The Assignee will be required to electronically sign the document
- Needs to Acknowledge - The Assignee will be required to confirm that they reviewed the document & set an expiration date if needed
- Needs to Approve - The Assignee will be required to "Approve" or "Deny" the document & if denied they can leave notes for the previous assignee
- Receives a Copy - The Assignee will receive a copy but no action will be required
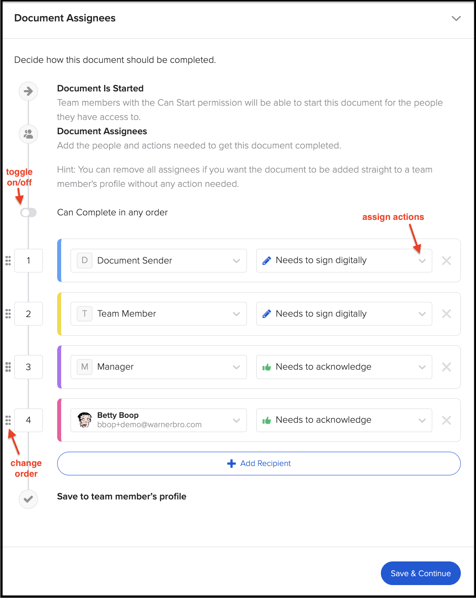
You can change the order in which the document is completed by moving the numbers to the right (you can also toggle on "Can Complete in any order" if no order is required)
You can add more recipients to the document flow (as many as you'd like)
You can click into the drop-down and choose WHO should take action. You can choose the Document Sender, Team Member, Manager, Full Access Admins, Document Admins, or even a specific person including external admins (like the CEO!)
Once you've created our customized document workflow, you can click Save & Continue.
Pretty cool, right?
If you have any questions, please feel free to reach out to support@goco.io 💚