🛠️ Step by Step Guide:
- As a Full Access Administrator, navigate your way to the Workflows App. You can do so by either finding the Workflows card on your company home page

- or on the Navigation tab on the left side of your screen.
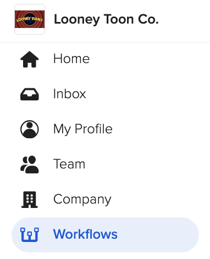
- or on the Navigation tab on the left side of your screen.
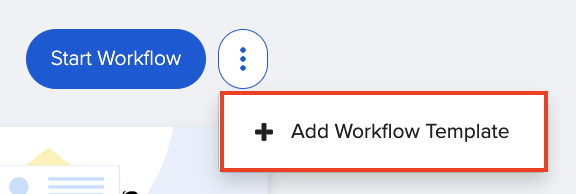
- You will be taken to the "Templates" tab. To start creating your new workflow click on the ellipsis button at the top right of the screen and select "+Add Workflow Template".
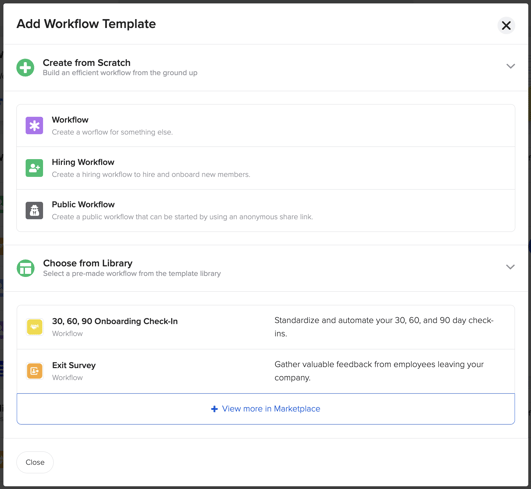
- GoCo will display a pop-up with two options for you to choose from:
- Create from scratch
- Workflow
- Hiring Workflow - to learn how to customize Hiring Workflows click here!
- Public Workflow - to learn how to customize Public Workflows click here!
- Choose from Library
- Exit Survey
- IT Equipment Request
- Not interested in the first two feature templates listed? Click "+View More in the Marketplace" to access our full library of templates
💡 If you're choosing from the library click here to learn more on how to customize a template.
- Create from scratch
- Selecting "Workflow" in the "create from scratch" section will immediately take you to the Workflow Settings page to begin adding your basic information.

- Provide a Workflow Template Name
- Provide a Description (helps workflow starters understand what the workflow is about)
- Provide the order you want your tasks to be completed.
- Customize a Workflow Icon
- If you wish to set a schedule for your Workflow click here to learn more. This step is optional.
- Next, customize your notification settings. This step is also optional!
- Review your default permissions. If you wish to change these permissions check out this article.
- Continue to the build tab. Here GoCo will begin to guide you through a step-by-step process in building your Workflow.
🌟 As you move through each step, hover your mouse over the question mark icon at the top left of the screen. You'll notice that the articles listed will change to match each step, thus tailoring your process by providing relevant resources every step of the way.
- Start with choosing your workflow starter.
- After choosing your workflow starter customize your start form (optional) by adding instructional text, images, fields, etc.
- Next, begin adding tasks, or group your tasks to better organize them.
- Add assignees, add start dates or due dates, to your tasks.
- In the permissions category of your tasks modify who can view and/or complete the task as well as reassign and comment.
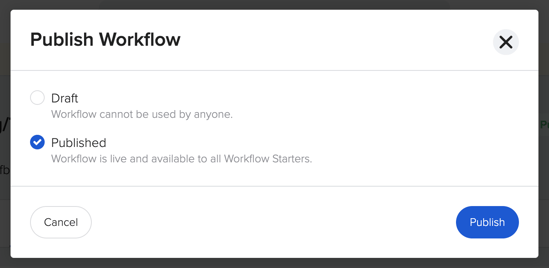
- Once you've added all your tasks and set all your customizations. You're ready to publish your Workflow!
Advanced Workflow options:
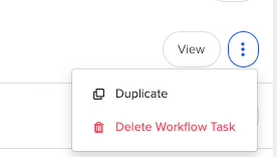
Wow, that was a lot! Did you know you can duplicate tasks to make the next task even easier? Simply click the three dots next to the task you want to duplicate and click "Duplicate"
Check out the Data Sources Tab:
This page summarizes ALL the form fields and Documents being used within a Workflow. This allows Admins to audit and view all the data for a Workflow in a single place, without having to click through tasks.
Notice each section tells you how many tasks each field is being used in. You can edit all fields in this tab as well. The same thing applies to Documents.
If you have additional questions, please reach out to suppport@goco.io! 💚