In the crazy hustle of business, making sure folks get paid back for their expenses ASAP is key. We get that the old-school way of doing expenses is a pain – manually typing in every detail and sorting through messy reports? Ugh, not fun.
But guess what? Our brand-new Expense Management App is here to save the day. It's easy to use and sorts out all the hassle of submitting, tracking, and managing expenses within GoCo. Time-saver for everyone – employees and admins alike. 🚀
Adding the Expense Management App to your GoCo Account
If you haven't already add the app to your account! Simply visit the Marketplace by clicking on the Marketplace card on the left-side menu.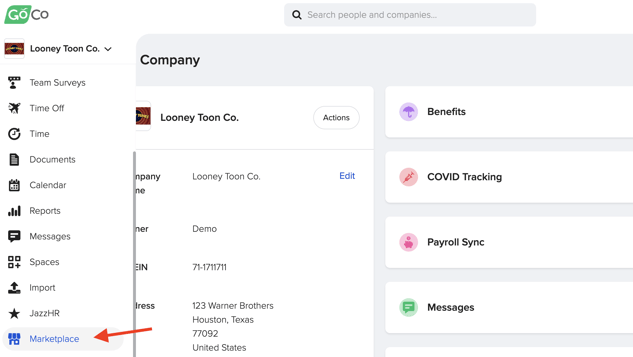
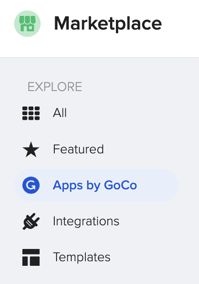
Once in the Marketplace, filter your view by clicking "Apps by GoCo" at the top left of the page
Now find the Expense Management Card and click on it to open the download prompt. Click "+Add Expense Management"

The next step will prompt you to confirm your billing information to process your Expense Management subscription.
Building an Expense Management Policy
To access Expense Management you will have a new tab in the left-side navigation. This will take you to a page to begin building your policy. 
Select "Set up Expense Management Policy", and provide a name for the policy. 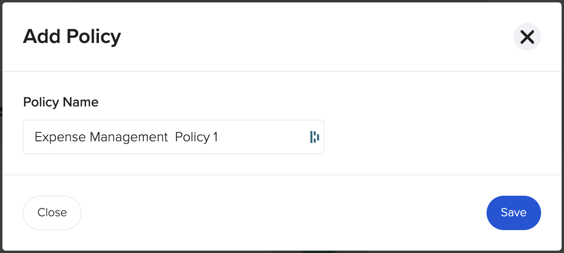
Now it's time to complete the setup in by following these simple steps.
- Select the policy members who will be participating in the policy.

Note: You can filter your team members by clicking on the filter icon at the top left corner.
- Choose who will be reviewing and approving team members’ expense reimbursement requests.
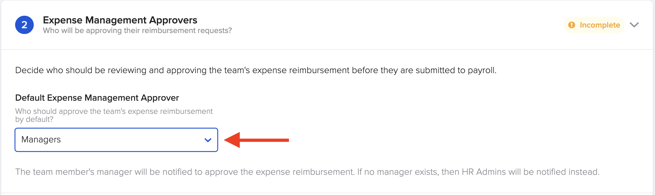

- Notice that you have the option to customize approvers per employee, if you choose not to use the default approver.
- Now choose which categories to include in the policy by toggling on or off your options.
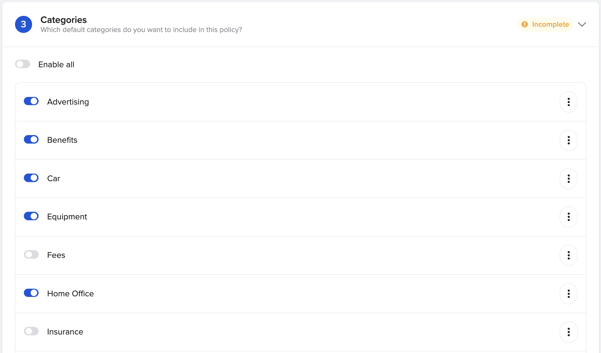
- If administrators do not see their desired category in the provided list, they can manually add additional categories to the policy.

- Admins can also add any subcategories they wish to each category.

- Within each category/sub-category, click the "Edit Category" to update the name & create rules for this category.
 You can choose between default rules & setting custom rules such as requiring a receipt or description.
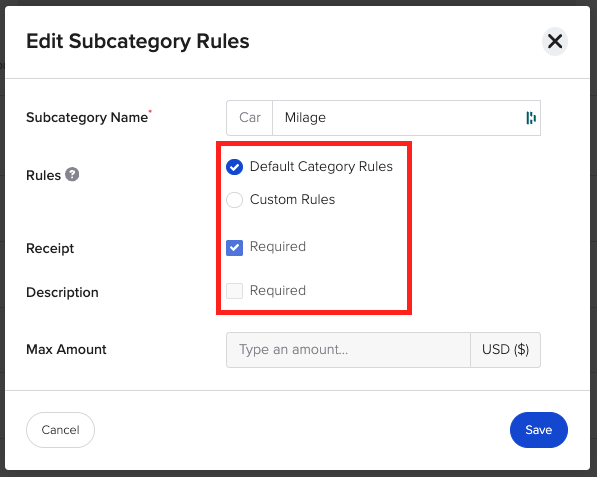
- If administrators do not see their desired category in the provided list, they can manually add additional categories to the policy.
- Next, set your Policy Rules overall. Please note that any rules that you set in the previous step will override these rules.

- Finally, take a moment to carefully review the policy and make any necessary last-minute adjustments before proceeding to finalize and select the "Finish" button.


Your policy is now set up and ready for use! 💚
Note: the message at the bottom before finalizing simply means all expenses must be business-related expenses. GoCo does not have the capability to add tax rates. If this is something of interest please provide your feedback to help@goco.io
To learn more about how to submit a request click here!
Check out this crash course on getting started with GoCo's Expense Management app.