How to create a Schedule in the Time App
Coordinate shift scheduling more efficiently by leveraging our scheduling feature to eliminate manual errors, reduce communication gaps, and improve overall efficiency.
Use the links below to skip around in this article.
With our Scheduling feature, you can create and share custom work schedules with your team. Here are some important points to know about scheduling:
- Add, and repeat shifts for employees.
- Notify team members when their schedule is published.
- View your schedules the way you want with team member and job views.
- Update schedules with ease. Republishing will automatically notify team members of changes.
Before creating a schedule, make sure that you have enabled scheduling for the desired time policy.
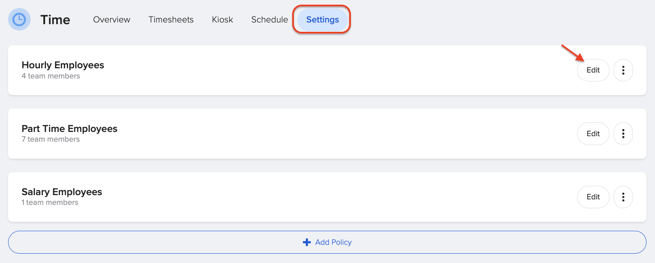
- To enable the scheduling feature, log in as an admin and access the Time app.
- Click on the "Settings" tab to view your policies, then click "Edit" on the policy of your choice.

- Scroll down to the "Scheduling" section and expand the card. Then, simply toggle on the "Enable Scheduling" button and click on continue.

Now let's make our way back to the Time Settings App. At the top of the page you should now see a "Schedule" tab available.
Building a Schedule
- From the Time App click on the "Schedule" tab at the top of the page.

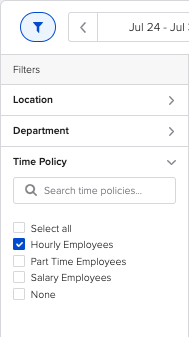
- Before creating a schedule keep in mind all employees that are in policies that have scheduling enabled show in one schedule. They can be filtered by policy in the filters located on the top left corner of the modal.

- To add a shift click on the the + icon on the date and employee you desire.

❗️Note: If you add a shift in the Unassigned Shift row you can assign them to the designated employee later by simply clicking and dragging! This can be very useful if you want to plan the week first and then assign shifts out to employees.
- When adding a shift you'll be prompted to select the Time, Job, Work Location, and Department.

- When selecting a Job assign custom colors to give easy visual cues to distinguish between jobs.

- If it's a repeat shift, you'll also select days of the week it applies to and when it ends on.

- If the employee has multiple locations, or departments they will appear in the drop down.
- When selecting a Job assign custom colors to give easy visual cues to distinguish between jobs.
- Click "Save" to add the shift to your schedule.

- When looking at the schedule click and hold allows you to drag and drop shifts.
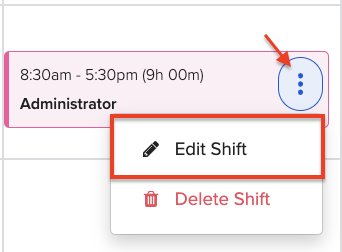
- To edit a shift simply click on the ellipses on the shift to re-open the setup modal.

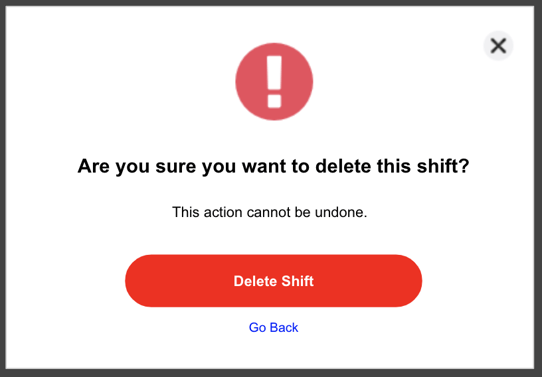
- To delete a shift, click on the ellipses and choose "Delete Shift". If the shift has not been published yet, no other action will be taken. However, if the shift has already been published, you will be asked to confirm the deletion and select which team members to update.

- Once you've built out your entire schedule and assigned your shifts. You're ready to publish! Simply click the blue "Publish" button on the bottom right of the page.
Additional things to note when Scheduling.
- At the top right of the page there is an ellipses button that gives you options to view Settings, Clear Unpublished Shifts, or Delete All Shifts
- By default Settings will sync to your time policy. If you wish to change them you can do so here.
- If you have multiple unpublished shifts to delete use the Clear Unpublished Shifts to save you some clicks!
- If you have published shifts to delete use the Delete All Shifts button. Follow the prompt to decide how you'd like to update your team members.
For a visual demonstration of the steps mentioned above, you can watch this helpful video.
Scheduling FAQ
- What is the “unassigned shift” area on the timesheet?
- This is for use when the admin knows they need specific shifts for the week but are not sure who they want to assign yet, so they can hold there until decided & assigned.
- Can Managers know if an employee is late?
- Yes! In the settings of your schedules, you can add late thresholds to notify managers. Read more about this here!
- Can I rearrange the days of the week to match the work week? Sun-Sat for example?
- Yes, in the scheduling settings (defaults to what’s selected in the time off policy) but you can change it
-
Can I toggle between different time policies?
-
Yes! You can also filter by job type or employee.
-
- Is there validation for assigning a shift/job to an employee who doesn’t have said job in their profile?
- There is currently no validation/warning in the scheduling app. You can assign them any job at the company from scheduling BUT if it is not on their profile they won’t be able to clock in.
-
Is it possible to create static schedules and then assign employees accordingly (like a template)?
-
Not yet! But this may be available in a future version 😉
-
-
How are notifications sent out? Are they via the preferred method of contact?
-
They are sent out through GoCo's typical notification pattern which is the preferred contact method. This setting can be configured under Contact Information in the employee's profile.
Please note that text is not available unless the messages add-on has been purchased.
-
-
Can we accommodate for overnight shifts?
-
Currently, there is no dedicated setting for overnight shifts. However, you can effectively manage them by creating two consecutive shifts: the first shift should conclude at 11:59 PM, and the subsequent shift should commence immediately afterward.
-
-
Can we create a schedule and allow employees the ability for employees to "grab" open shifts?
- Not at this time but this may be available in a future version so stay tuned!
-
Will scheduling flag overtime?
-
- Not at this time but this may be available in a future version so stay tuned!
-
-
Are there any shift-swapping capabilities?
-
- Not at this time but this may be available in a future version so stay tuned!
-
-
Can EEs see each other's schedules?
- You can enable this if desired in your schedule settings.
-
Are termed employees automatically taken off the schedule?
-
Yes! They will automatically be removed!
-
- Does the EE need to go to their inbox to review their schedule again or will it display on their profile?
- Nope! There is a schedule card on the employee's profile page!
- Nope! There is a schedule card on the employee's profile page!
If you have additional questions please email us at support@goco.io. Happy Hiring! 💚