GoCo is a flexible, all-in-one HR solution that makes it easy to automate and streamline all your HR, from hiring and onboarding to benefits, payroll, and more. Our mission at GoCo is to help businesses spend less time on manual, painful, and complex HR tasks to focus on growing happier, more productive teams.
Greenhouse Recruiting’s integration with GoCo syncs candidates & candidate data from Greenhouse to GoCo when the hired stage is reached. Keep reading to learn how to set up this integration.
Setting Up your Integration
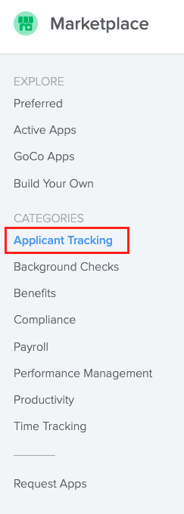
In GoCo, navigate to your Marketplace either from the main navigation tabs on the left side of your screen or from your company home page.

Find Greenhouse by clicking on the “Applicant Tracking” tab under Categories.
Once you locate Greenhouse, click the blue "+Add" button

This will take you to view all of the premade recipes available for this integration & to "Build Your Own". Check out our help article on how to "Build Your Own" recipe here!
Before you are ready to "Build Your Own" recipes, however, you will need to activate this integration.
Begin by hitting the "Use This Recipe" button next to the recipe titled "Sync Candidate to GoCo when candidate stage is changed to "Hired" in Greenhouse.”

This will open a new screen to edit this recipe, here click the "Use This Recipe" button again. 
GoCo will buffer for a minute before letting you know that your recipe is ready for testing. Now we will hit "Test recipe" & resolve any red highlighted items.

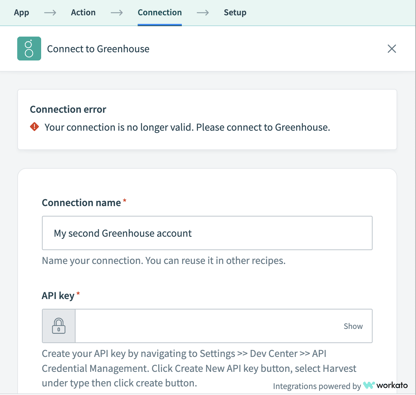
You will be taken back to this screen & will now need to complete the following two steps to get connected.

- Validate connection to Greenhouse by entering the Harvest API key
- Create a Webhook for the Greenhouse Recruiting/GoCo Integration
Please Note: To configure the Greenhouse Recruiting / GoCo integration, you’ll need the developer permissions Can manage and configure web hooks and Can manage ALL organization’s API Credentials in Greenhouse.
To assign this permission, find a Greenhouse Recruiting user in your organization with Site Admin permission and the user-specific permission Can edit another user's advanced permissions to update your account.The Site Admin can update your permissions by navigating to your user page. Select Configure icon
> Users > Your Name.
The Site Admin should scroll to the User-Specific Permissions panel on your user page and expand the Developer Permissions dropdown menu.
Select Can manage and configure web hooks & Can manage ALL organization’s API credentials in the Developer Permissions section and click Save.
Repeat as necessary for any other user that needs to set up the integration.
Step 1: Create a Harvest API Key for the Greenhouse Recruiting/GoCo Integration
In Greenhouse, click on the Configure icon and select Dev Center on the left.

Select API Credential Management in the Dev Center.

From the API Credential Management page, click Create New API Key to generate the API key for GoCo.

In the Create New Credential box, make the following selections:
- API Type: Harvest
- Partner: Optional
- Description: GoCo Harvest API Key
Click Manage Permissions.

Click Copy to save your API key to your clipboard. Store the API key in a secure location to provide to GoCo in the next step.
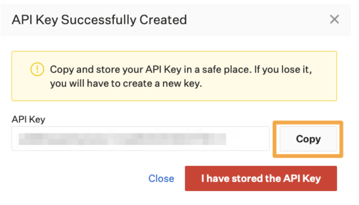
Click I have stored the API Key once you have copied and saved the key.
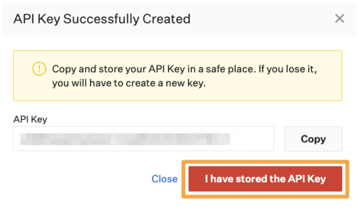
Note: You won’t be able to view the API key after clicking I have stored the API Key. If you lose your API key or need to access it later, you’ll need to generate a new key and provide it to GoCo.
Select the checkbox next to “Select All”.
When you’re finished, click Save.
Your Harvest API key for the Greenhouse Recruiting / GoCo integration is created and configured. You may now enter it in GoCo’s Integration Builder.
Step 2: Create a Webhook for the Greenhouse Recruiting / GoCo Integration
To create the Webhook, return to Greenhouse & click the Configure icon in the upper right corner then select Dev Center on the left.
Click Web Hooks on the Dev Center. Click Web Hooks again on the next page.

Enter the following information on the next page to configure a new webhook:
- Name: A descriptive name for your integration. Most customers choose GoCo Integration
- When: The time that the event will be sent to GoCo. Select the following options for this integration:
- CANDIDATE HAS BEEN HIRED
Endpoint URL: This is acquired from step 1, the trigger in the recipe.

-
Secret Key: You can use 123
Note: Before you can create the webhook, the recipe must be started.

When you’re finished, click Create Web Hook.

Note: Ensure that “Disabled?” is set to No or the webhook will not work.
Your Greenhouse Recruiting account and GoCo account can now communicate with each other in-real-time through webhooks. You may now enter it in GoCo’s Integration Builder.
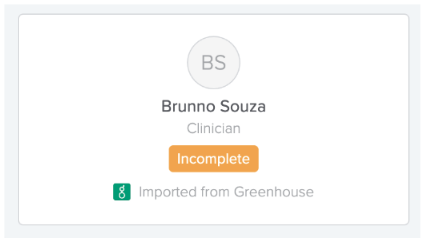
Now, simply move a candidate in Greenhouse to “Hired.”
Almost instantly, the employee will appear in GoCo showing that they were imported from Greenhouse!
For any additional questions, please reach out to us at support@goco.io or your Client Success Manager.
Happy Hiring! 🥥 💚