- If you have not already, set up a Zapier company account. You can set up a free account here: zapier.com
- Login to GoCo as a Full Access Administrator.
- Navigate to the Marketplace through the left side navigation or by selecting view on the Marketplace card.

Note: If you don't see the card, you don't have the right administrator privileges. Talk to the person at your company that manages your GoCo account. - From there you'll find a list of all of GoCo's Apps & Integrations. Zapier is listed in Preferred (default view) or in Productivity.
- Click the blue +Add button on the Zapier card to get started. Then click Setup
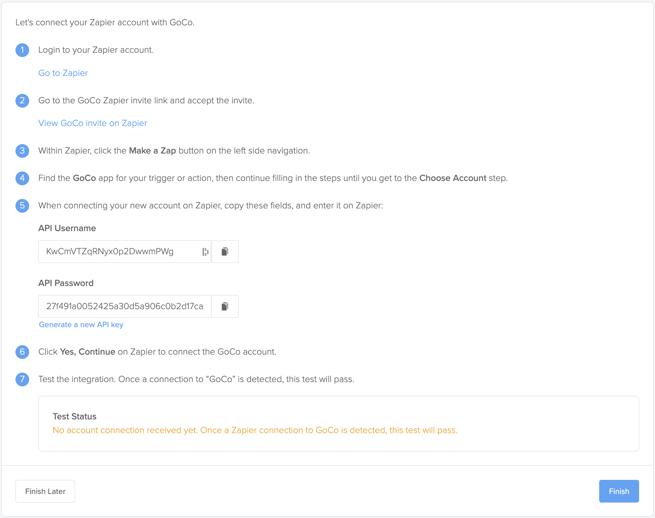
- Follow the instructions shown to connect your Zapier account:
- In Zapier, you need to find the GoCo integration to connect to it. As the integration is in BETA, you may need to use this link to find it:
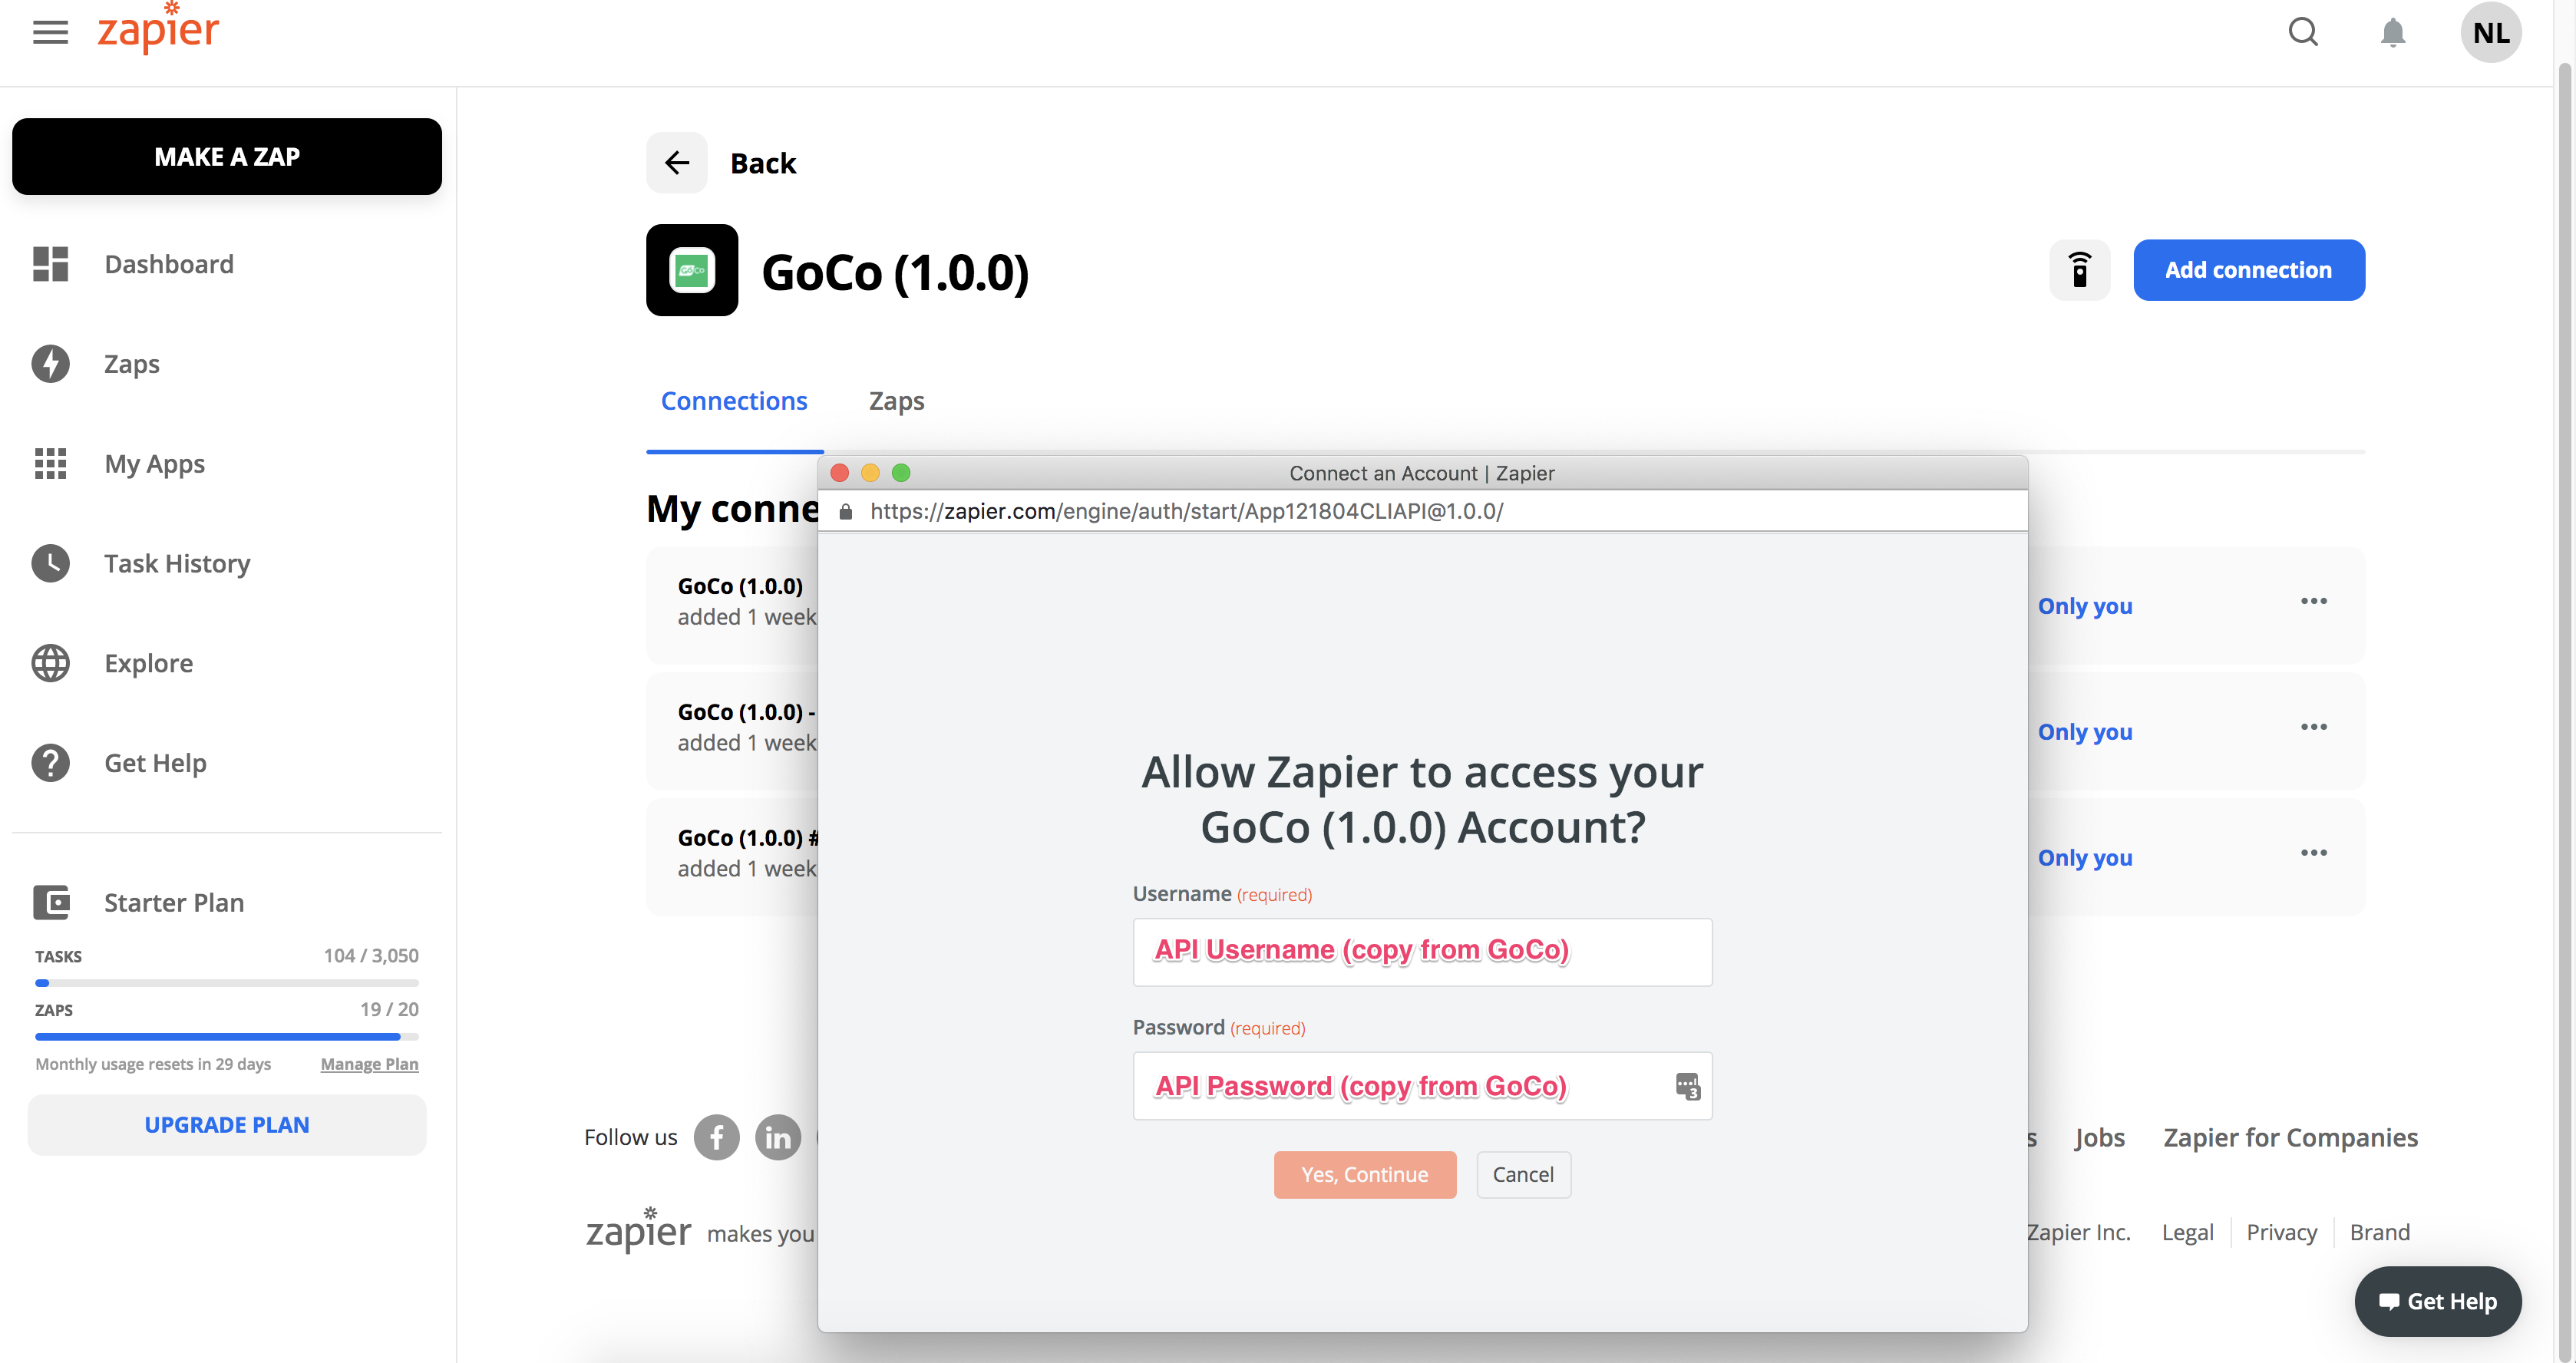
https://zapier.com/developer/public-invite/121804/0a2ba363a2d3e685a43020f4ed314e73/ - Once you get to the Connect an Account modal in Zapier, copy the API Username and API Password fields from GoCo, and enter them into Zapier here:
- ⭐ Once linked, Zapier will pull up "Employee A". This is a fake employee and will not be reflective of employees in your account.
- Once you have GoCo Connection created, go ahead and create a test Zap using your GoCo connection. The easiest one is to create a Google Sheet, and create a Zap to send an action to Create Employee in GoCo when a row is added to the Google Sheet.
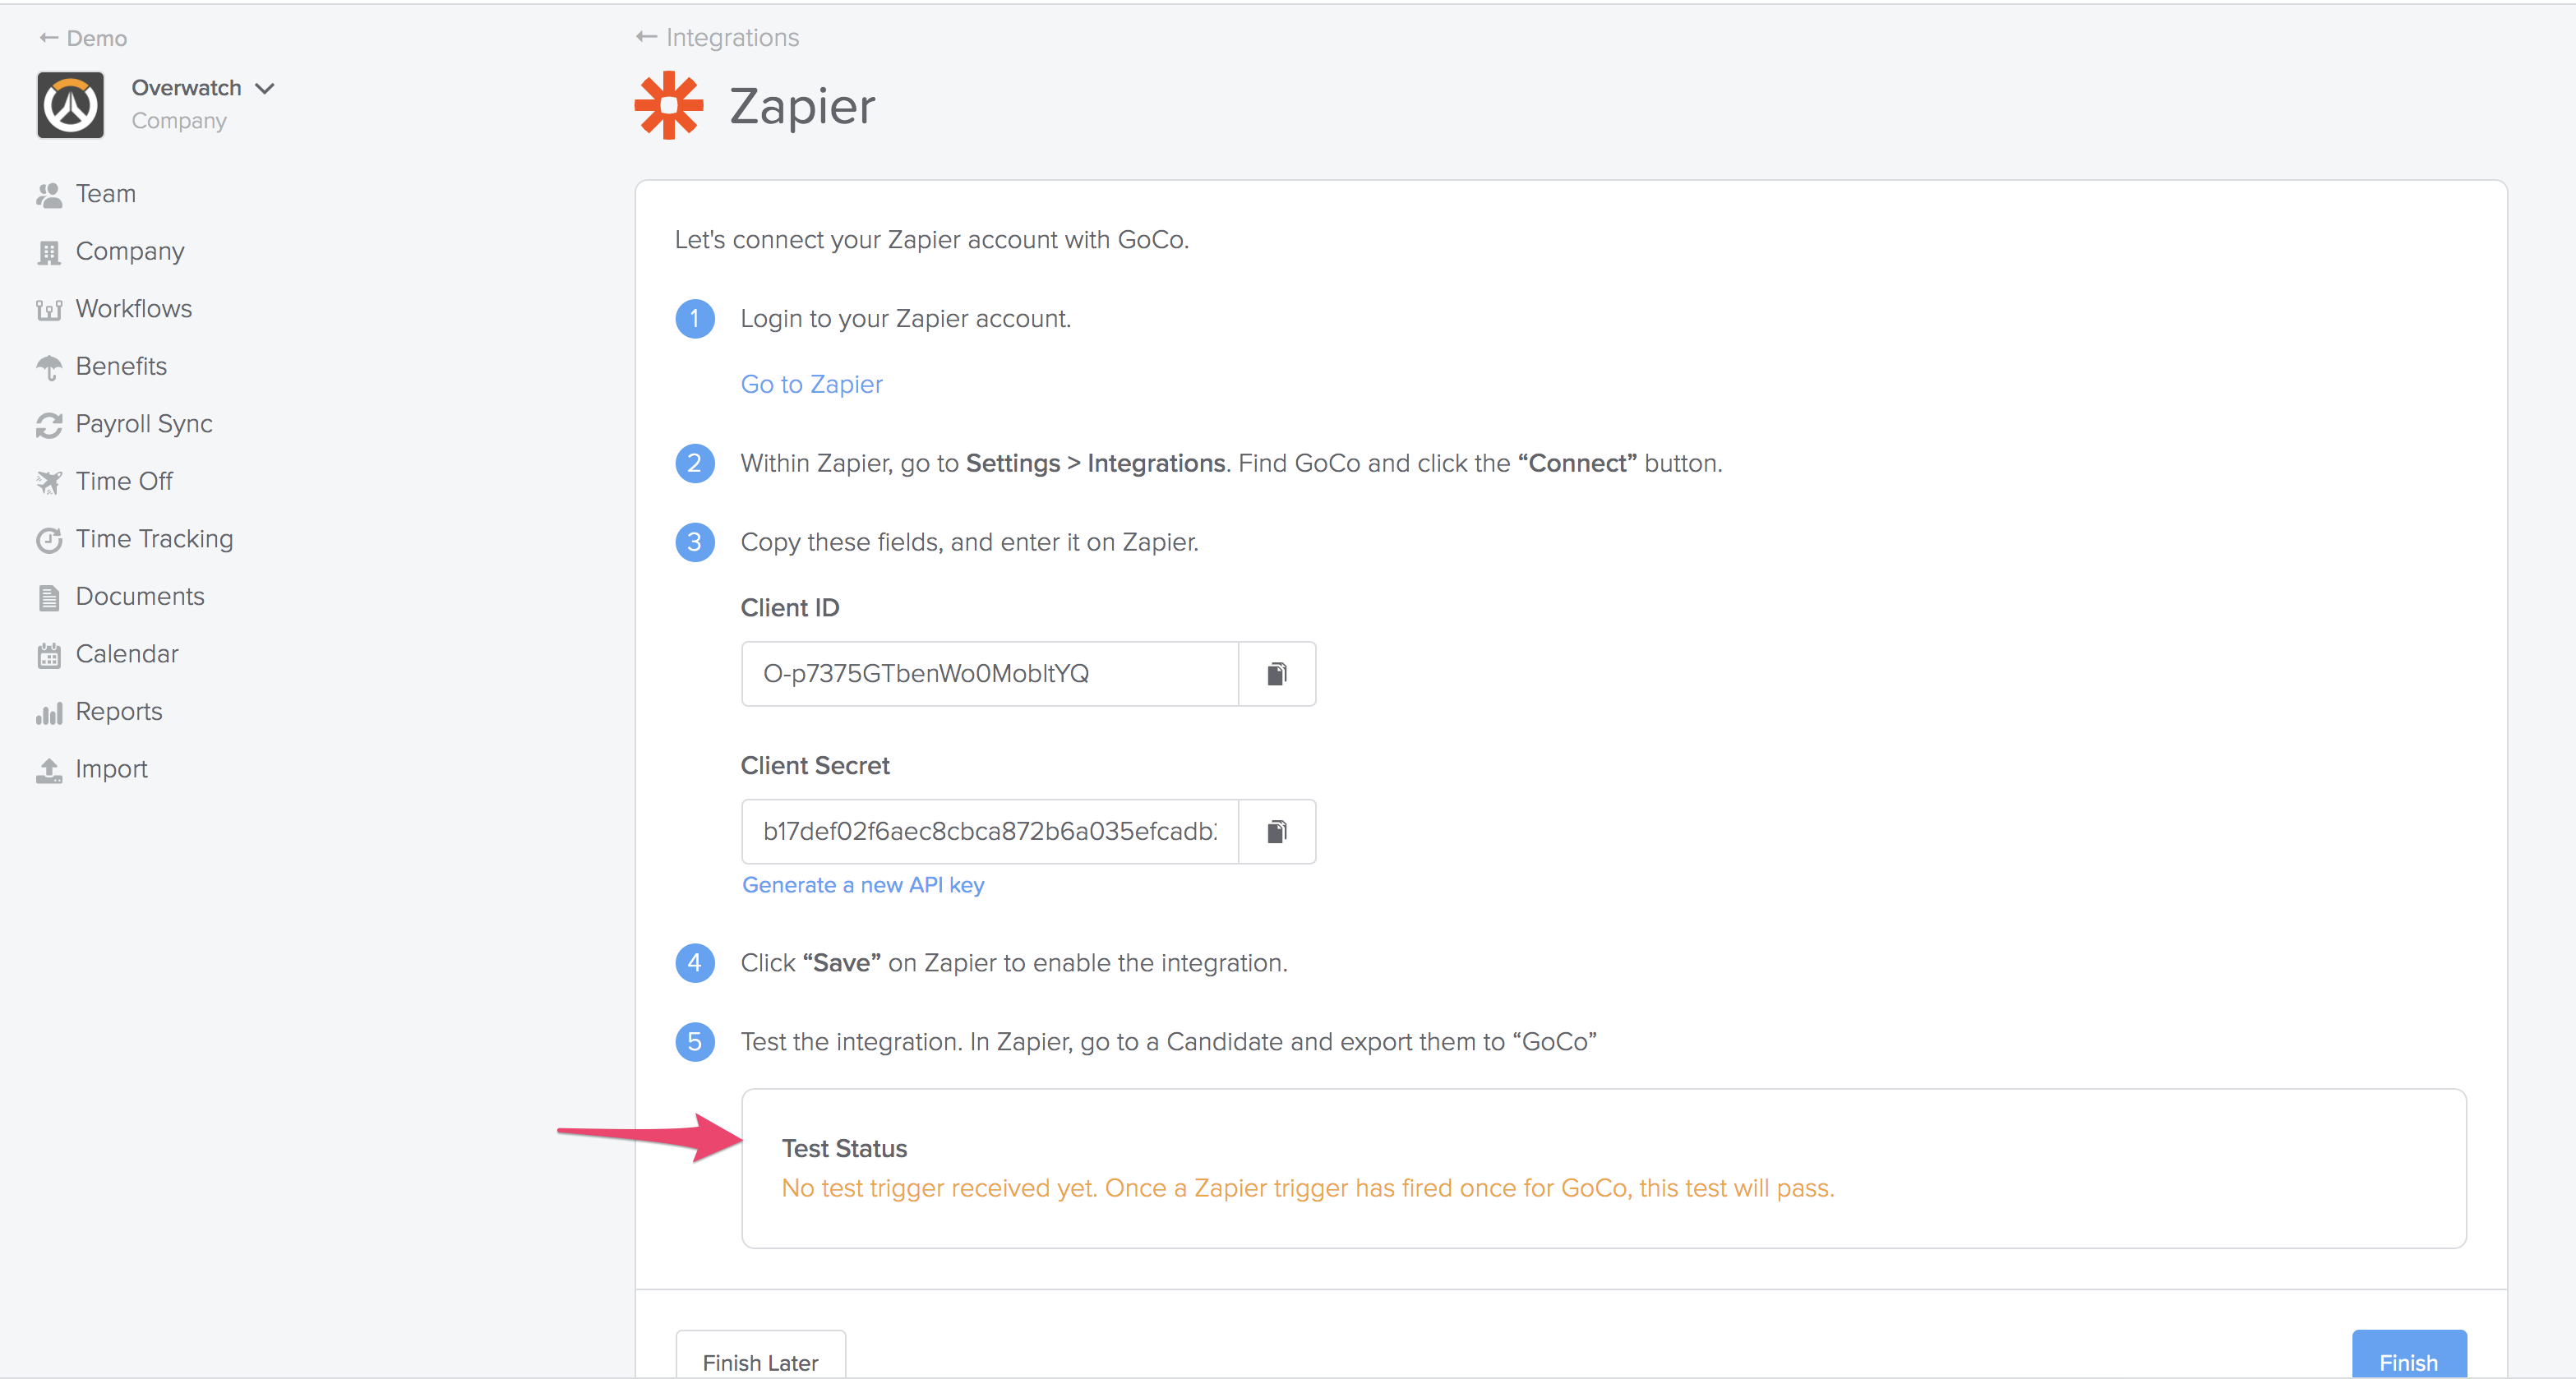
- Once GoCo detected your connection was successful, the Test Status will show as Passed:
- Click Finish to complete the setup in GoCo
- The Zapier Integration is now live for your company on GoCo. To understand how the integration works, please read this help article:
How does the GoCo + Zapier integration work?
For additional questions contact GoCo Support 💚