How to add GoCo Apps to your Workflow Tasks
Are you aware that you have the ability to enhance your workflow tasks by adding workflows, documents, performance reviews (add-on), and messages (add-on)?
Here's how:
From the floating toolbar, click on the Apps button to explore what GoCo apps can be inserted into workflow tasks.
Workflows
Make "Workflow-ception" happen by automating a workflow to start from within a workflow task.
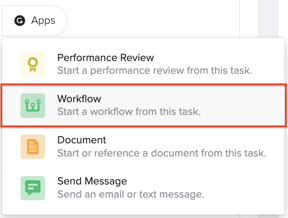
- To enable a workflow to start from an existing workflow, it is necessary to first create and publish the workflow that you are inserting.

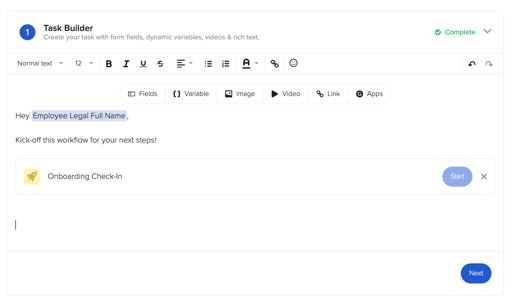
- Once that template is available you can insert it into the "Parent Workflow" which is the template you'll be using to start the second workflow with.
- You can add the "Workflow" at any step that you wish in the parent workflow as part of a "Task" in the Task Builder .
Documents
Streamline the completion of Magic Documents by adding them to a Workflow task.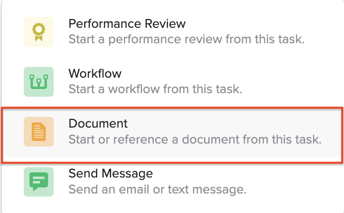
- Similar to Workflows to add a Document it is necessary to first create and publish the Document template that you are inserting.
- Once that template is available you can begin adding the Document to your Workflow task.
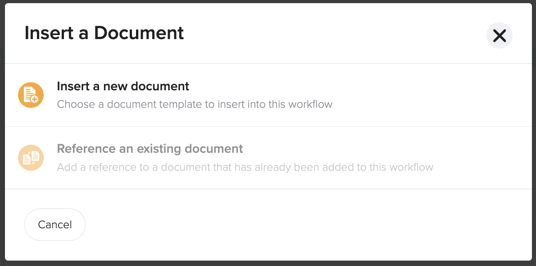
- Note: GoCo gives you the option to insert a document template or reference a document that's already been added to the workflow
- When inserting a new Document template select from your template library and click "+Add Document".
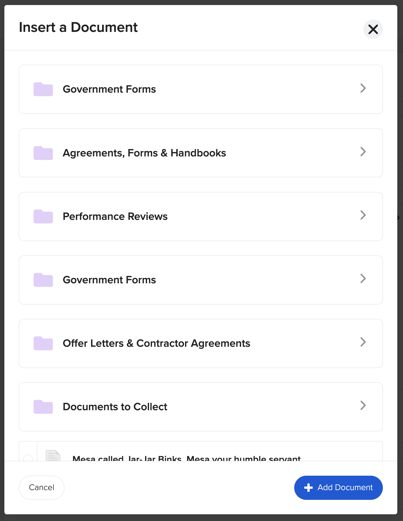
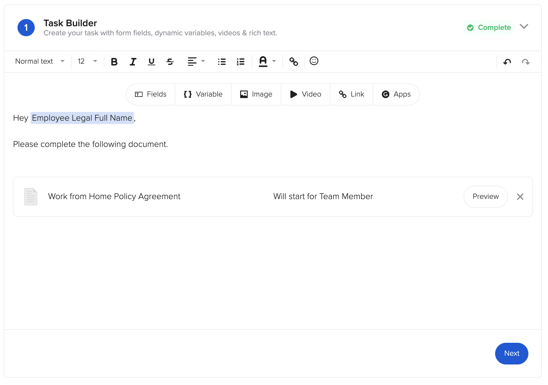
- You have the option to include a "Document" in any task that you create using the Task Builder.
Performance Reviews
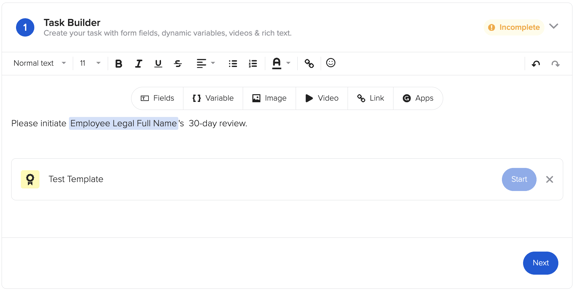
Streamline a new hire process by adding a 30-day check-in to a workflow.
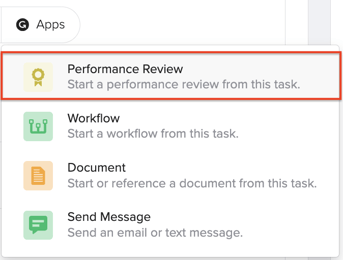
- To add a Performance Review it is necessary to first create and publish the Review template that you are inserting.
- Once that template is available you can begin adding the template to your workflow task.
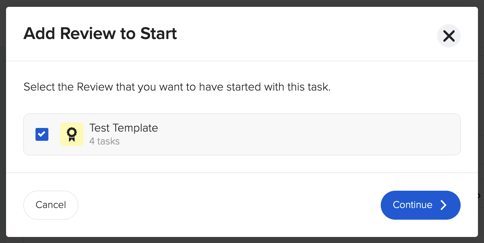
- You have the option to include a "Performance Review" in any task that you create using the Task Builder.
Messages
Easily streamline communications by kicking off a text message from a workflow task.
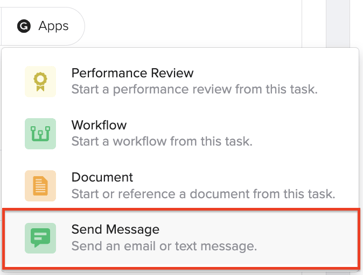
- This will add a "New Message" card to your task. Hit the blue, "Setup" button to start customizing your message.

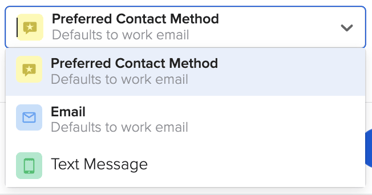
- You will be taken to a new screen to compose your new message. Name your message & then decide how you would like to send it (via the preferred contact method designated by your employees, email, or text).

- Hit "Save & Continue" to move on to composing your message.
- Now you will be able to decide who your message will be sent from & if you would like to add a "+ Reply To" address.

- After setting your "From" settings, select who this message will be going to. You will see dynamic fields relating to Locations, Departments, and any other Work Group added to the company - as well as supporting workflow targets like "Team Member" and "Manager" to choose from.
-
⭐ Dynamic Fields are awesome as they allow you to make selections like "Department" meaning that even if the users in that department change, the dynamic field remains the same! ⭐️

- Once you've selected your recipients, set up your Subject Line. When creating your Subject Line, note that you can utilize Variable Fields, like the recipient's name or manager's name, to fit this message to your needs. You can also edit the formatting & add images, hyperlinks, & videos to your message!

- Attach any files you wish to and decide if you would like this message to go out automatically when the task starts or if you would like it to be sent manually by the task assignee.

- Once your message has been set up, hit the blue "Continue to Preview" button at the bottom of the screen to preview your message.
- Your preview will appear & if everything looks good, hit the continue button at the bottom of the screen to return to creating your workflow!

And that covers every app that you can add inside of a workflow task!
For any additional questions please reach out to support@goco.io. 🤠