- Add "Code" values to "Location", "Division" and "Department" on GoCo.
- Set up vIDix Integration on GoCo
- Sync an Employee (to test)
- IMPORTANT: Set Employee Status to "Active" on vIDix
- vIDix Errors
1. Set up Labor Levels on vIDix
For Location, Divison, and Department to successfully sync to vIDix,
- The Labor Levels must be configured with the correct names in vIDix.
- Each Location, Division and Department in GoCo must have a "Code" value saved under Company > Locations, Divisions & Departments
If you do not have these setup correctly on vIDix, GoCo will NOT sync Locations, Divisions and/or Departments to vIDix.
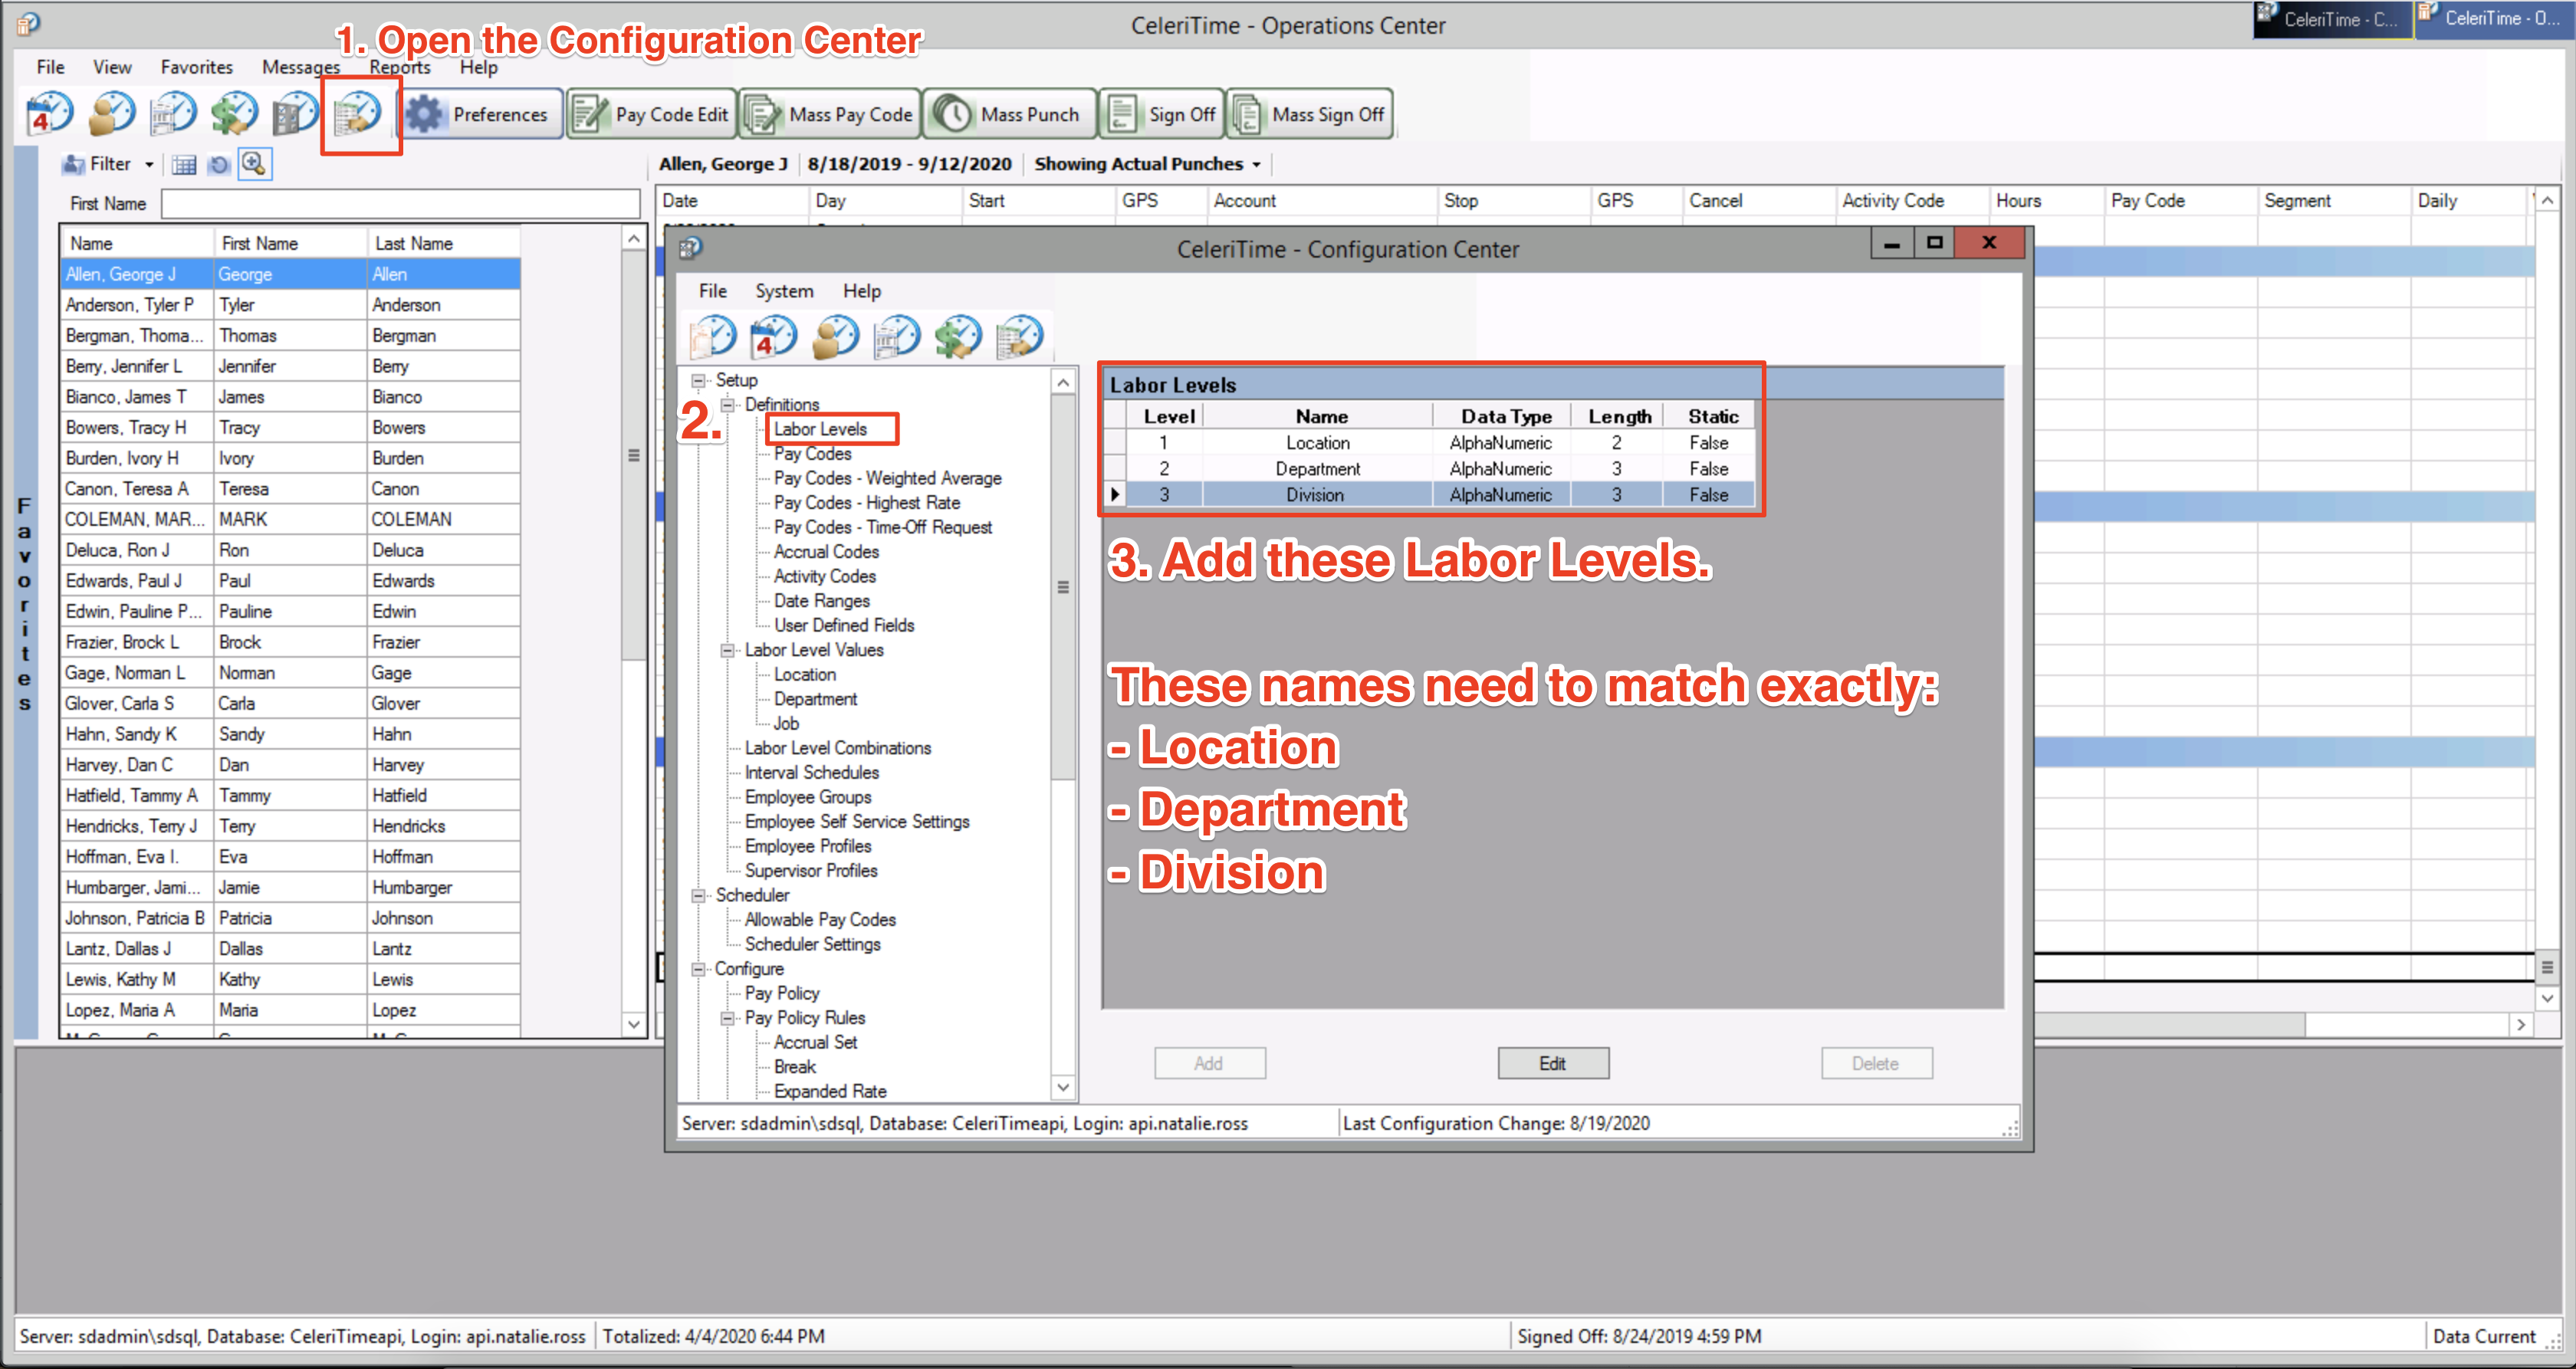
To setup the Labor Level definitions in vIDix, do the following:
1. Login to your vIDix account as an admin
2. Go to the Configuration Center
3. Expand Setup > Definitions > Labor Levels
4. Make sure you have each Labor Level with the following names
Location
Division
Department
2. Add "Code" values to "Location", "Division" and "Department" on GoCo.
If you want Location, Division and Department values to sync to vIDix for the team member, you'll need to make sure each one has the "Code" value saved on GoCo. GoCo will send this CODE as the value to vIDix.
- Login to GoCo as a Full Access Admin
- Go to Company > Work Groups
- Edit each Location, Division and Department and enter a CODE value.
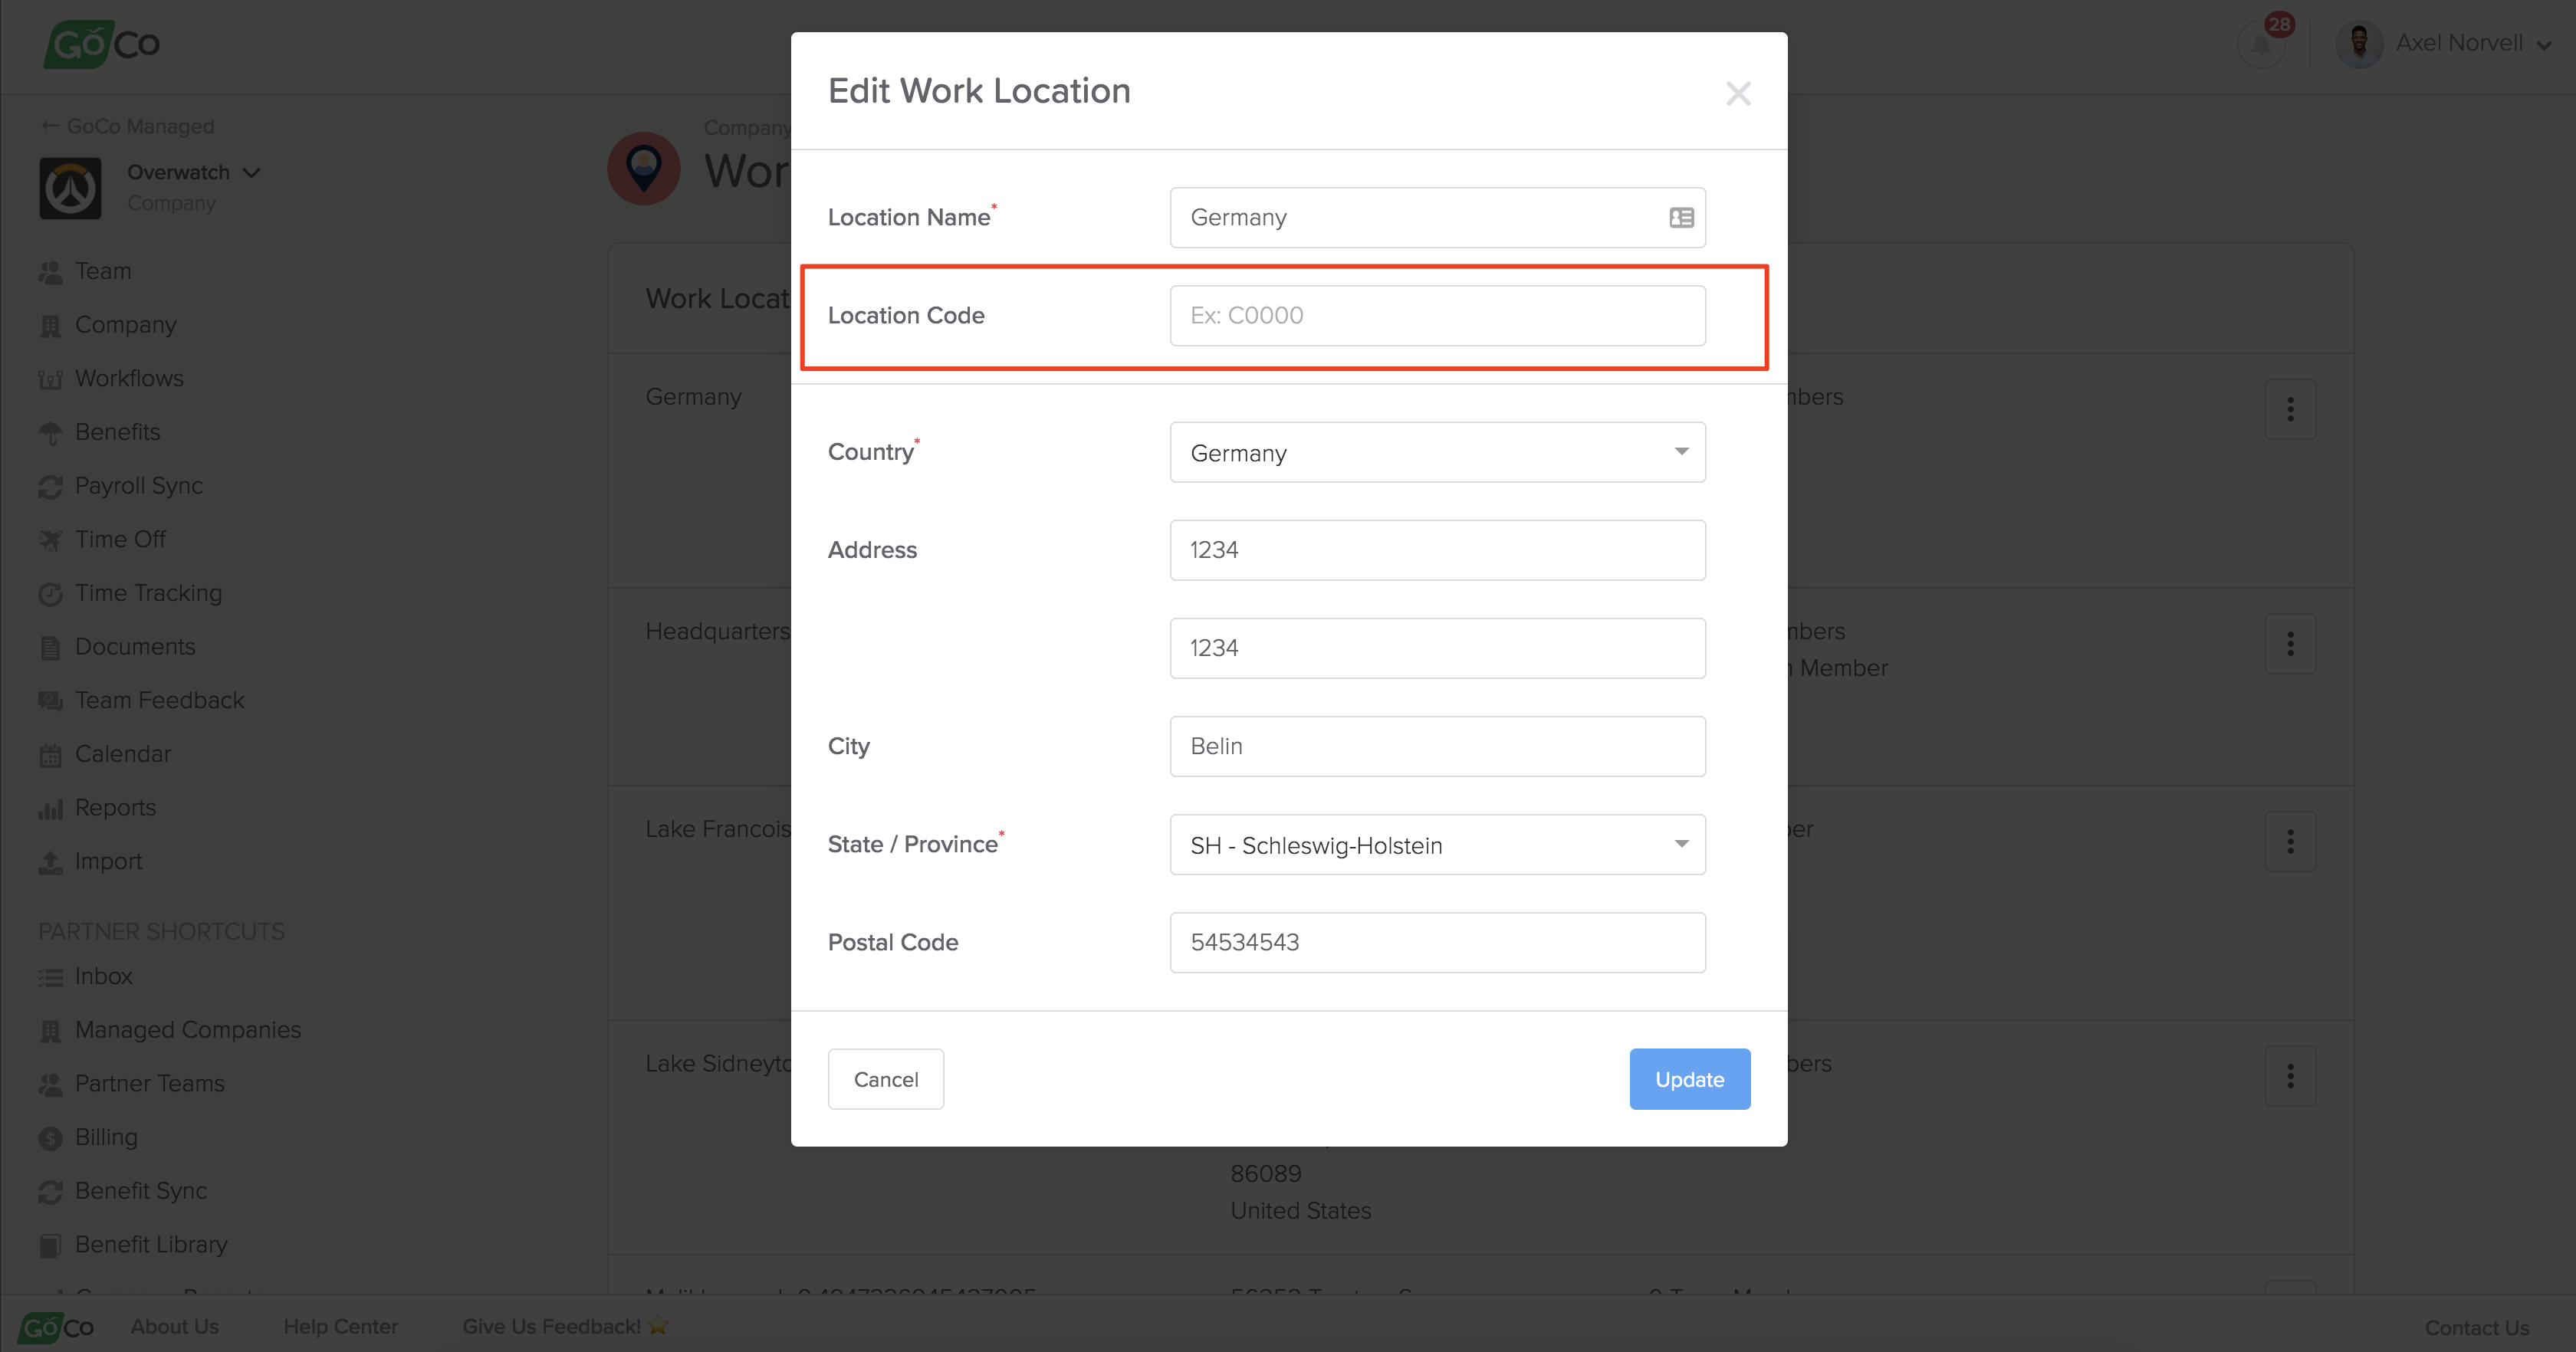
NOTE: The code value must be Alpha Numeric (EX: AB123) or Numeric (EX: 123) depending on how the Labor Level data type is configured in vIDix.
3. Set up vIDix Integration on GoCo
Now you can go ahead and set up the integration on GoCo doing the following:
- Login to GoCo as a user with Full Access permissions for the company.
- Go to Company > Marketplace
- Click +Add on the vIDix integration card, then Setup
- Fill in the vIDix login information. Please request this information from your vIDix support contact. If you encounter an error when continuing, your login information may be incorrect on this step.
- Select when team members should be added to vIDIX.
- Finish
You should now see the vIDix card on every team member's profile.

4. Sync an Employee (to test)
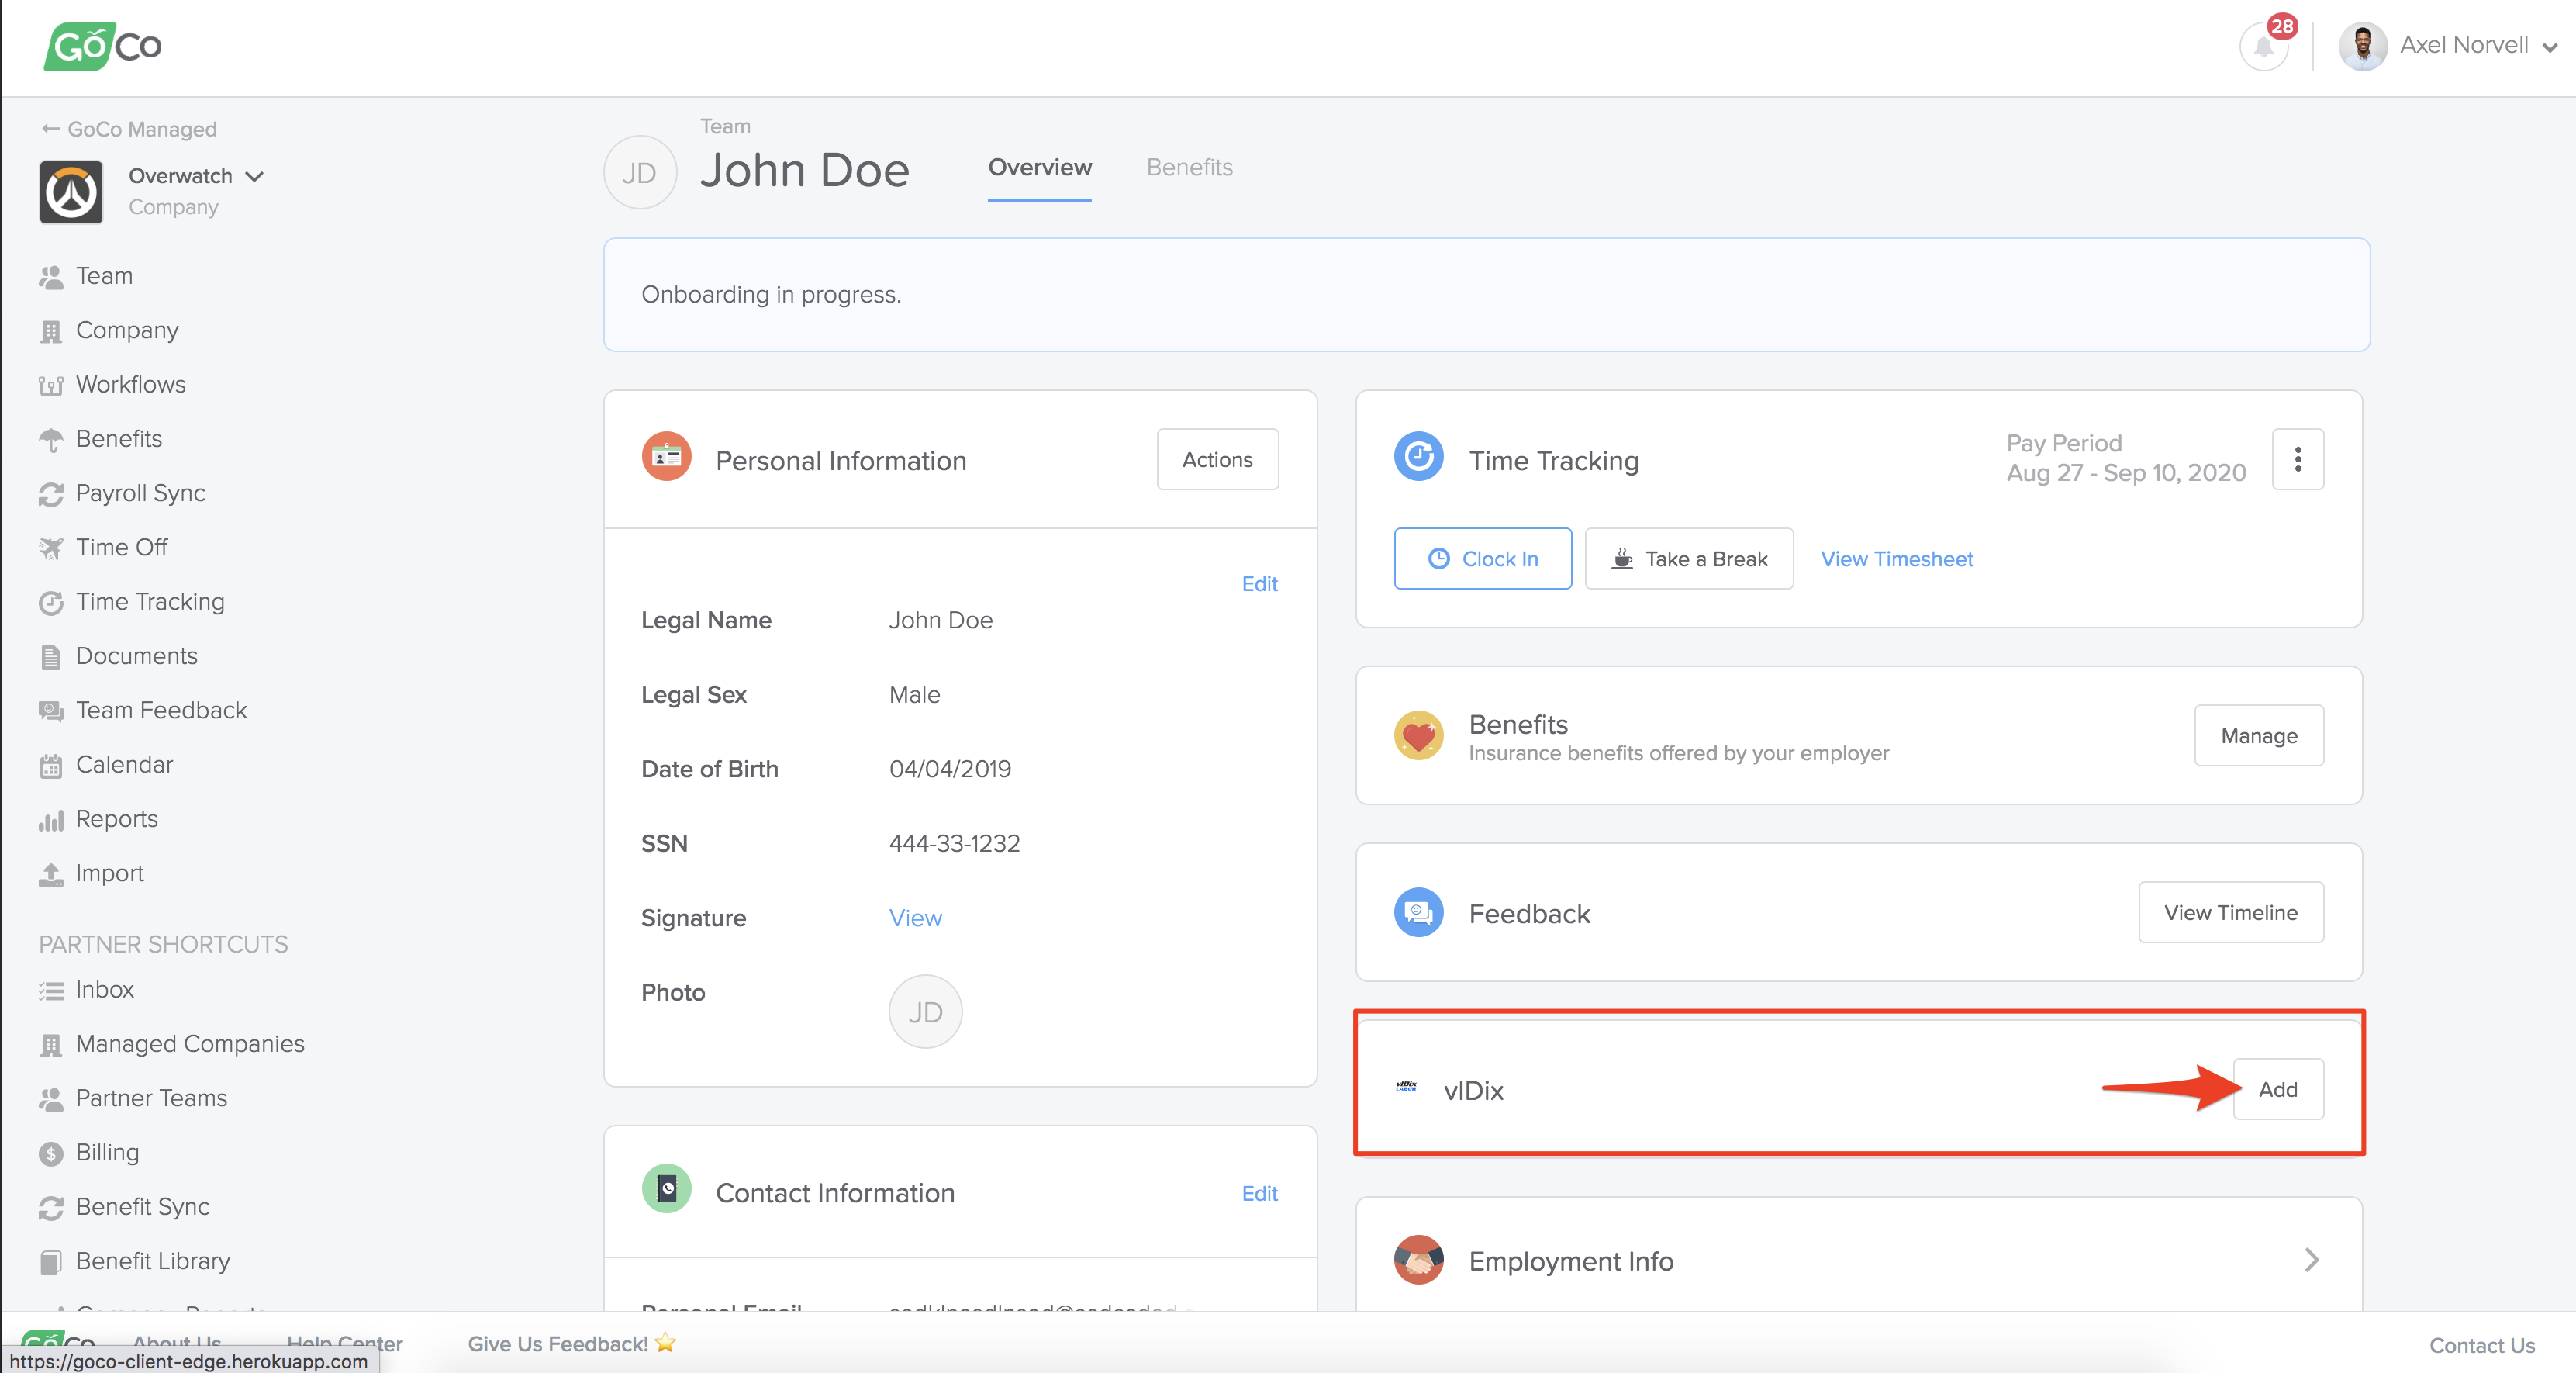
Now that the integration is set up, go ahead and try syncing an employee.
- Go to any employee's profile on GoCo and look for the vIDix card.
- Click Add to sync that employee to vIDix
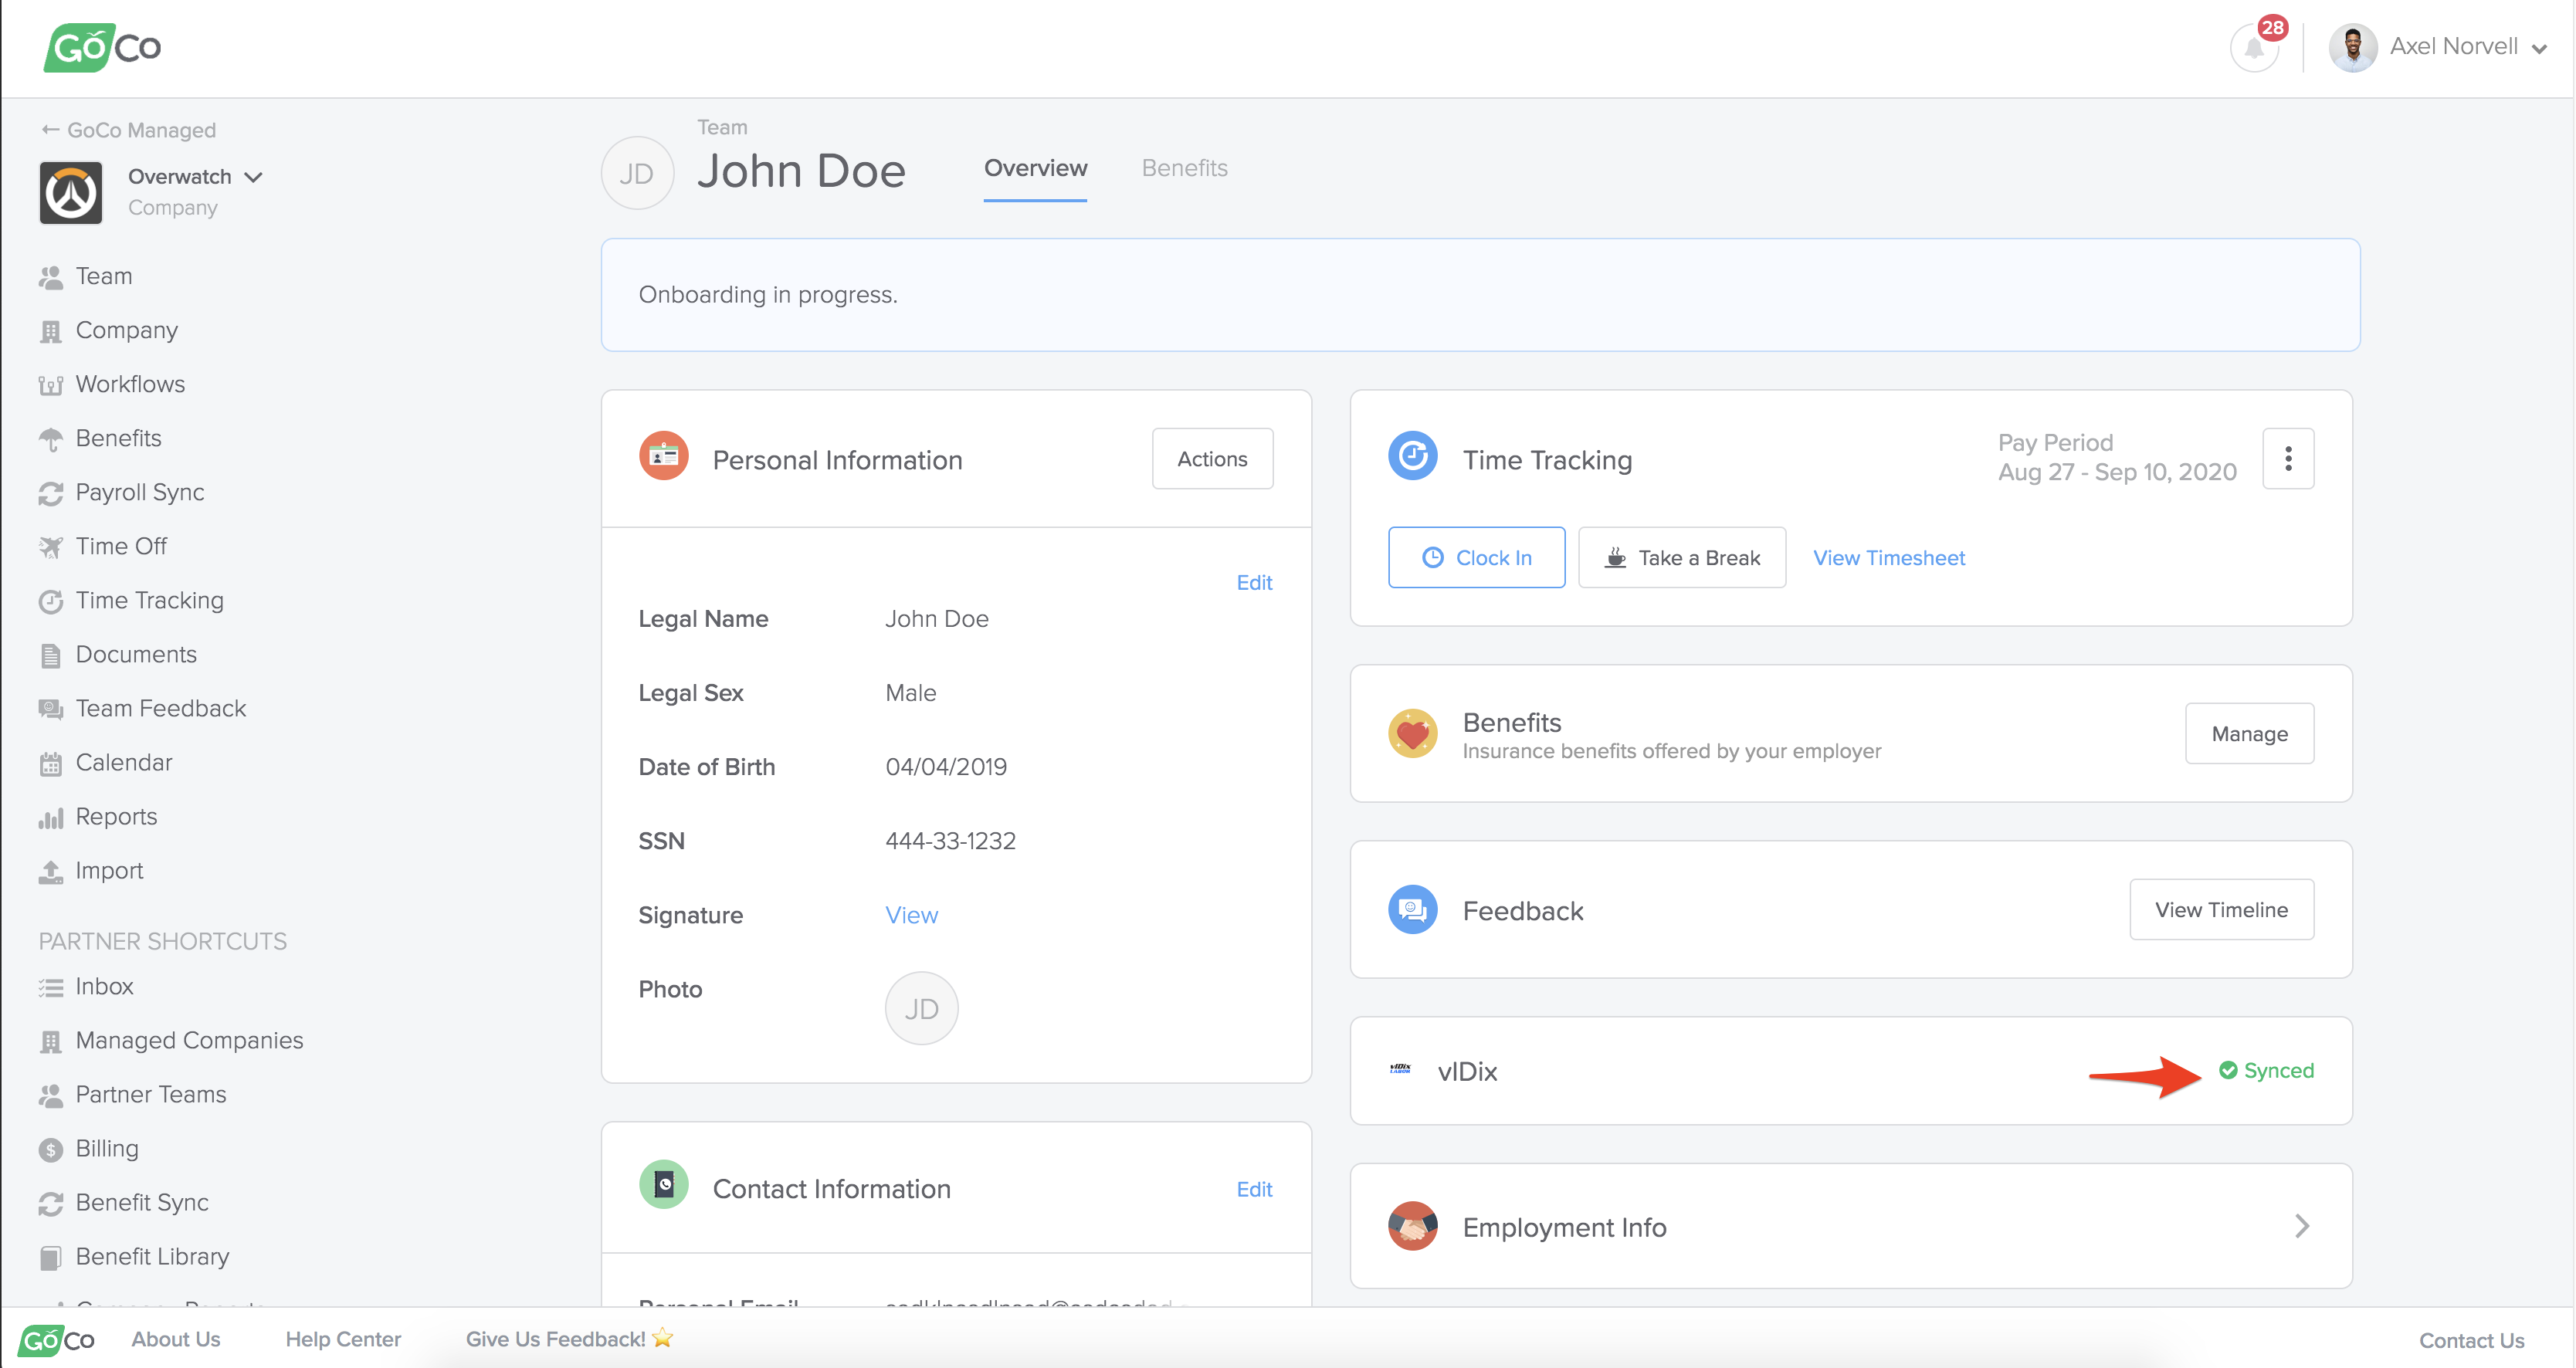
- Once synced, the vIDix should show a Synced status
4. Login to vIDix and confirm the employee appears as expected, with all the correct field values:
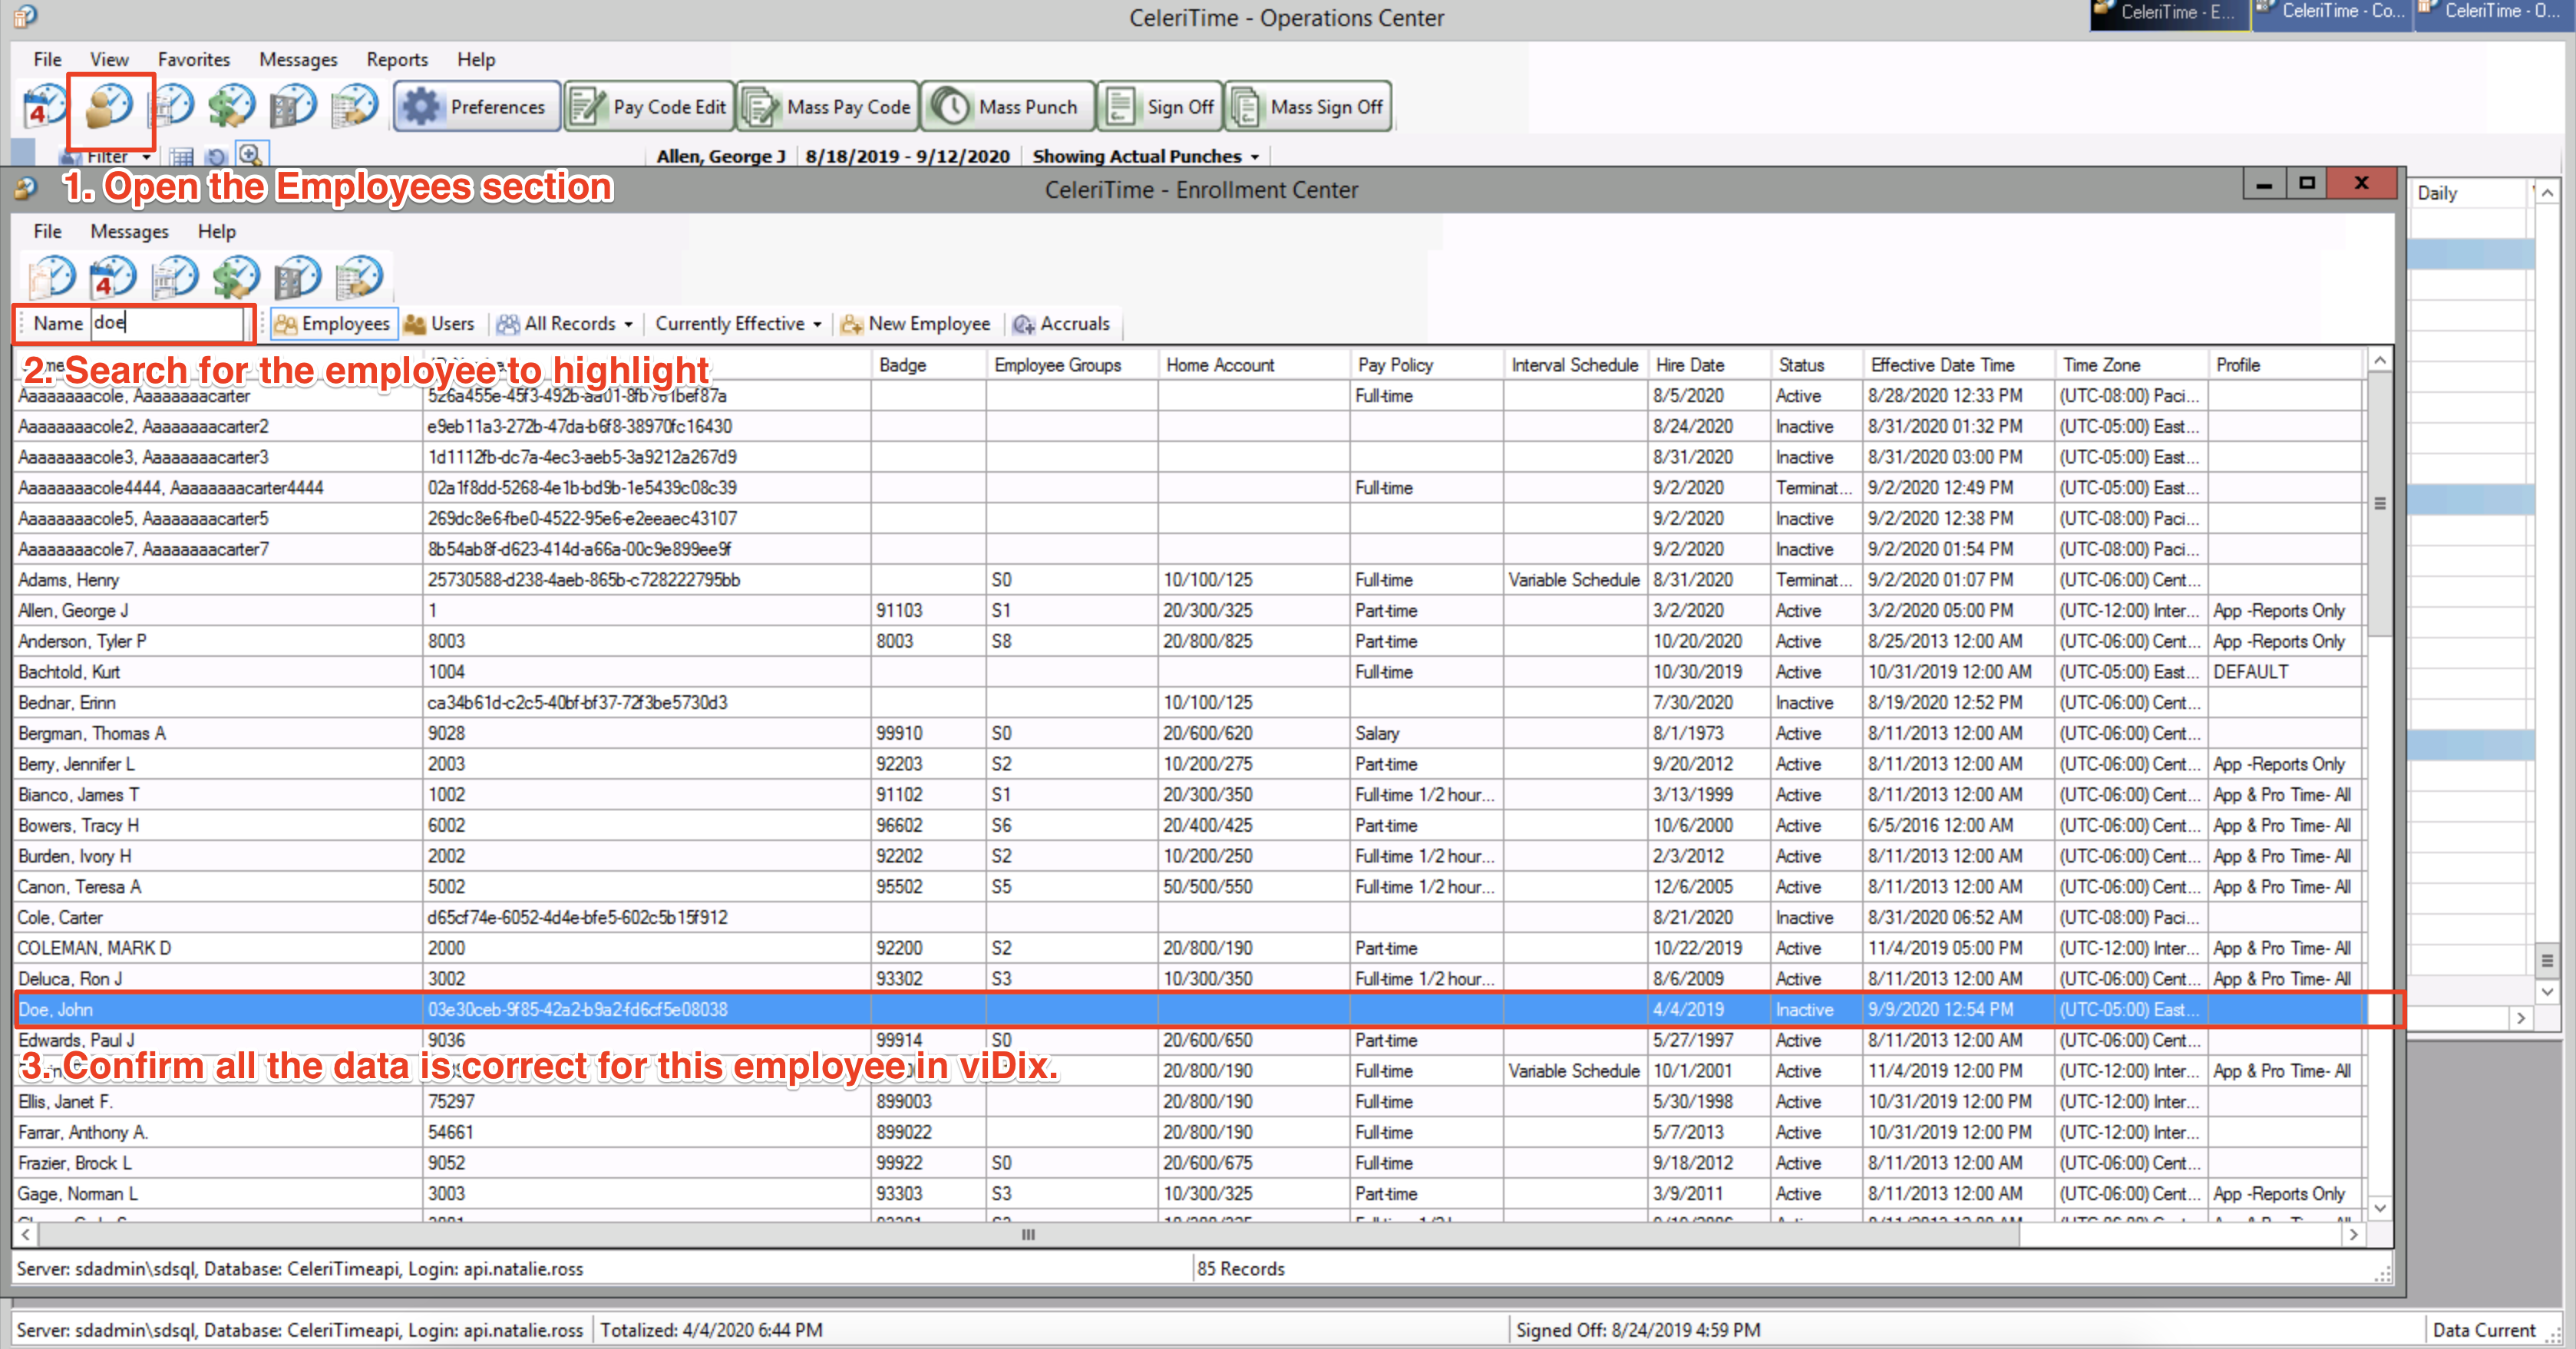
5. IMPORTANT: Set Employee Status to "Active" on vIDix
Whenever an employee is synced from GoCo to vIDix for the first time, their status in viDix will be set to INACTIVE.
This is because vIDix requires some data fields to be filled in before setting the employee to ACTIVE.
After the new-hire gets synced, you must login to vIDix and set that employee to ACTIVE.
- Open the Employee Edit window in viDix
- Add the Employee Groups:
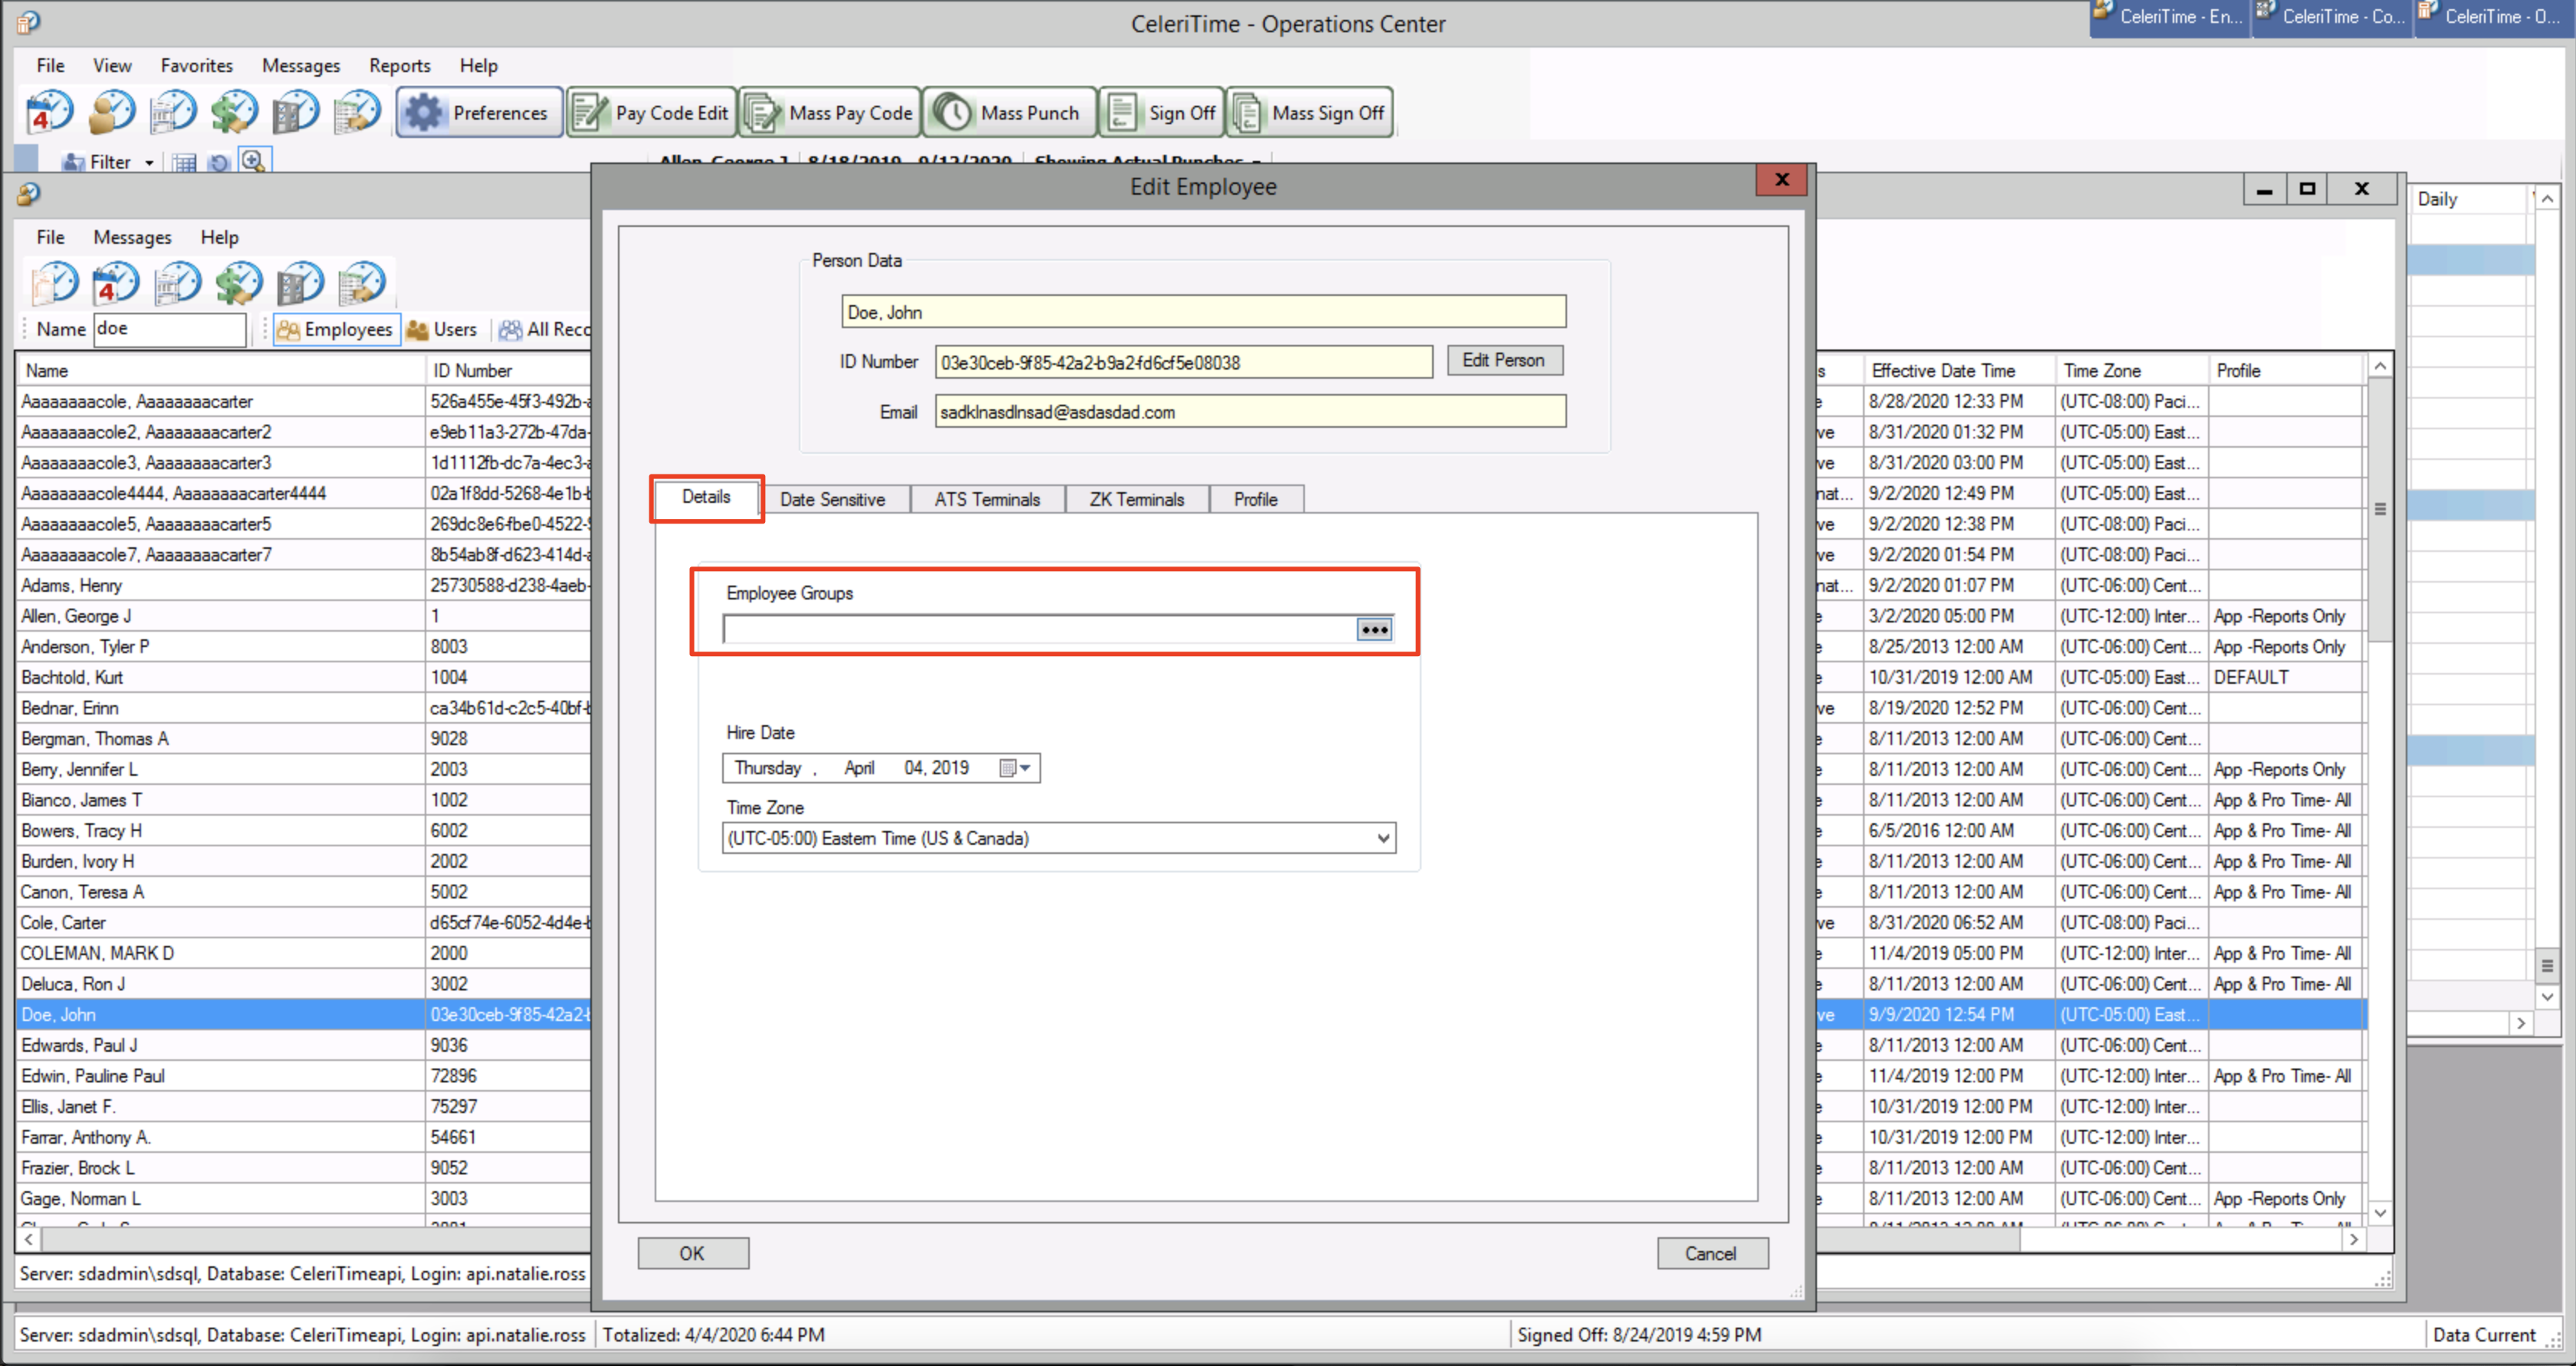
- Go the the Data Sensitive tab and fill in the Home Groups, Pay Policy, Status = Active, and click OK
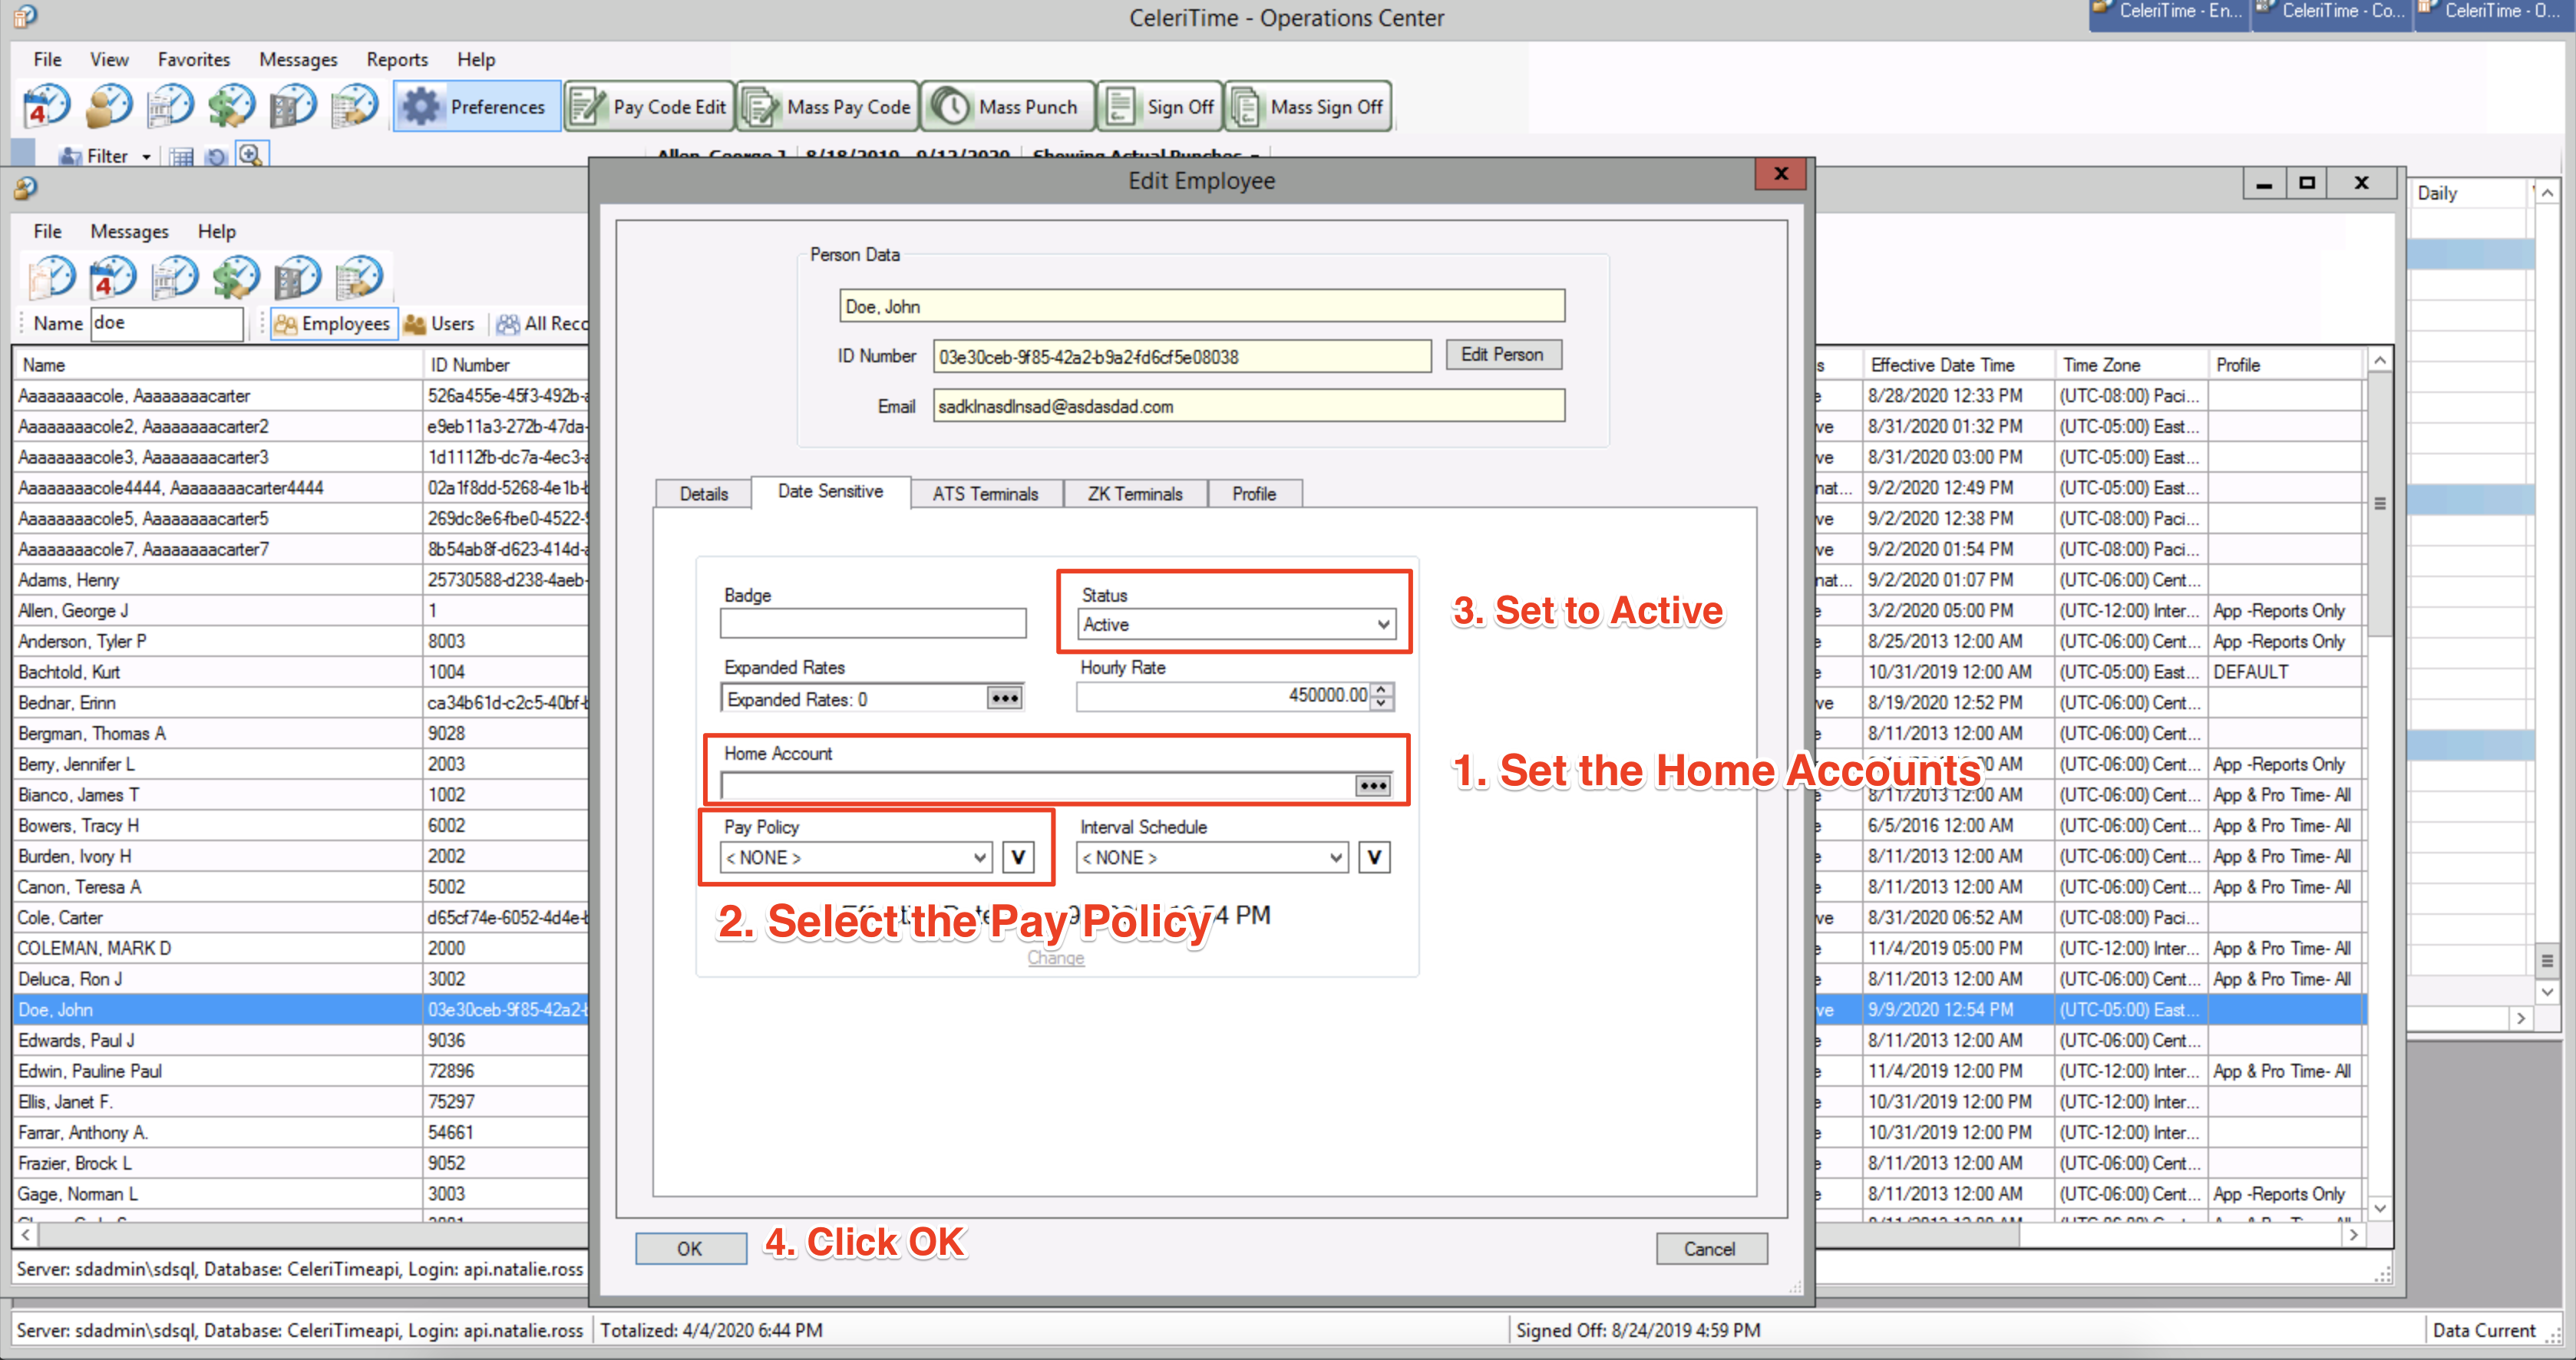
- The Employee should now be ready to start clocking in using vIDix.
6. vIDix Errors
Sometimes things aren't always perfect. When that's the case, GoCo detects and makes sure you're notified of when things go wrong with the viDix integration.
If GoCo detects an error or failure when attempting to sync to vIDix, GoCo will send a Notification in GoCo to all the Full Access Admins.
This notification will display the API error that vIDix sent back to GoCo. For assistance in addressing any errors, please contact your GoCo Account Representative and provide them with the vIDix error you received.