This import feature is only available to Benefit Administrators (those with full access to manage benefits).
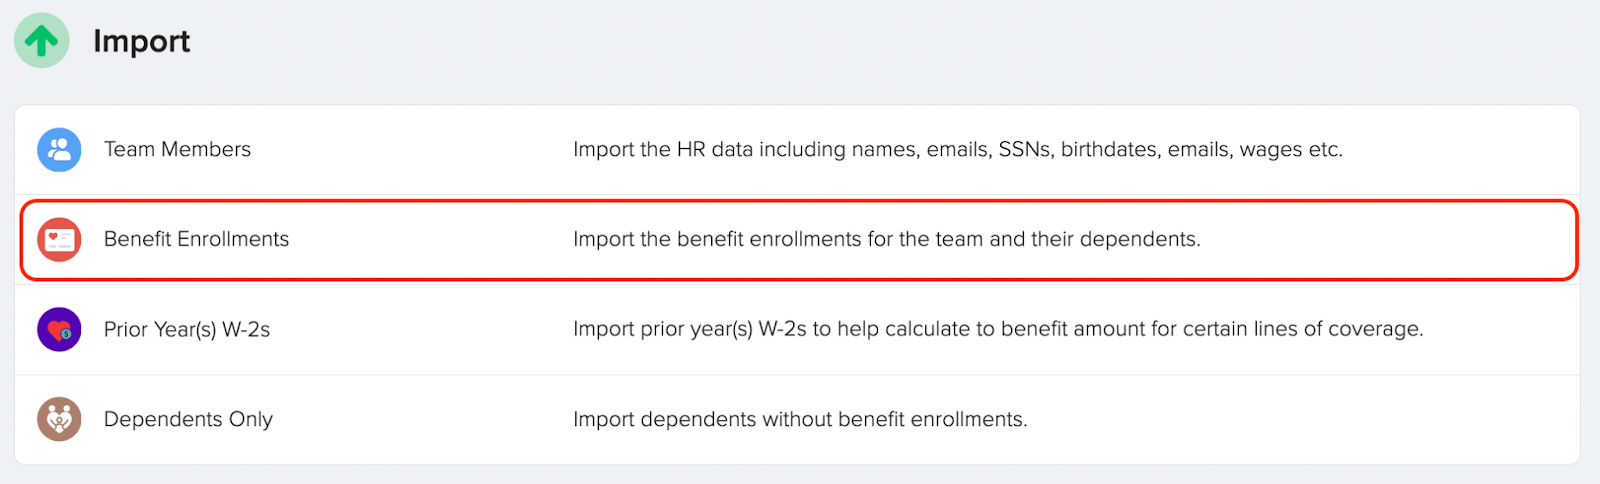
Once logged into GoCo on the left side menu, click Import then Import Benefit Enrollments and follow the next steps.
Step 1: Choose which benefit lines you want to import enrollments into.
📌 Tip: You’re only going to see the lines that are published or in review.
- After choosing the benefit line, you’ll decide which policy effective date you're updating. (Please note that if someone has already begun a benefits import previously then you will bypass this screen and begin on Step 2)

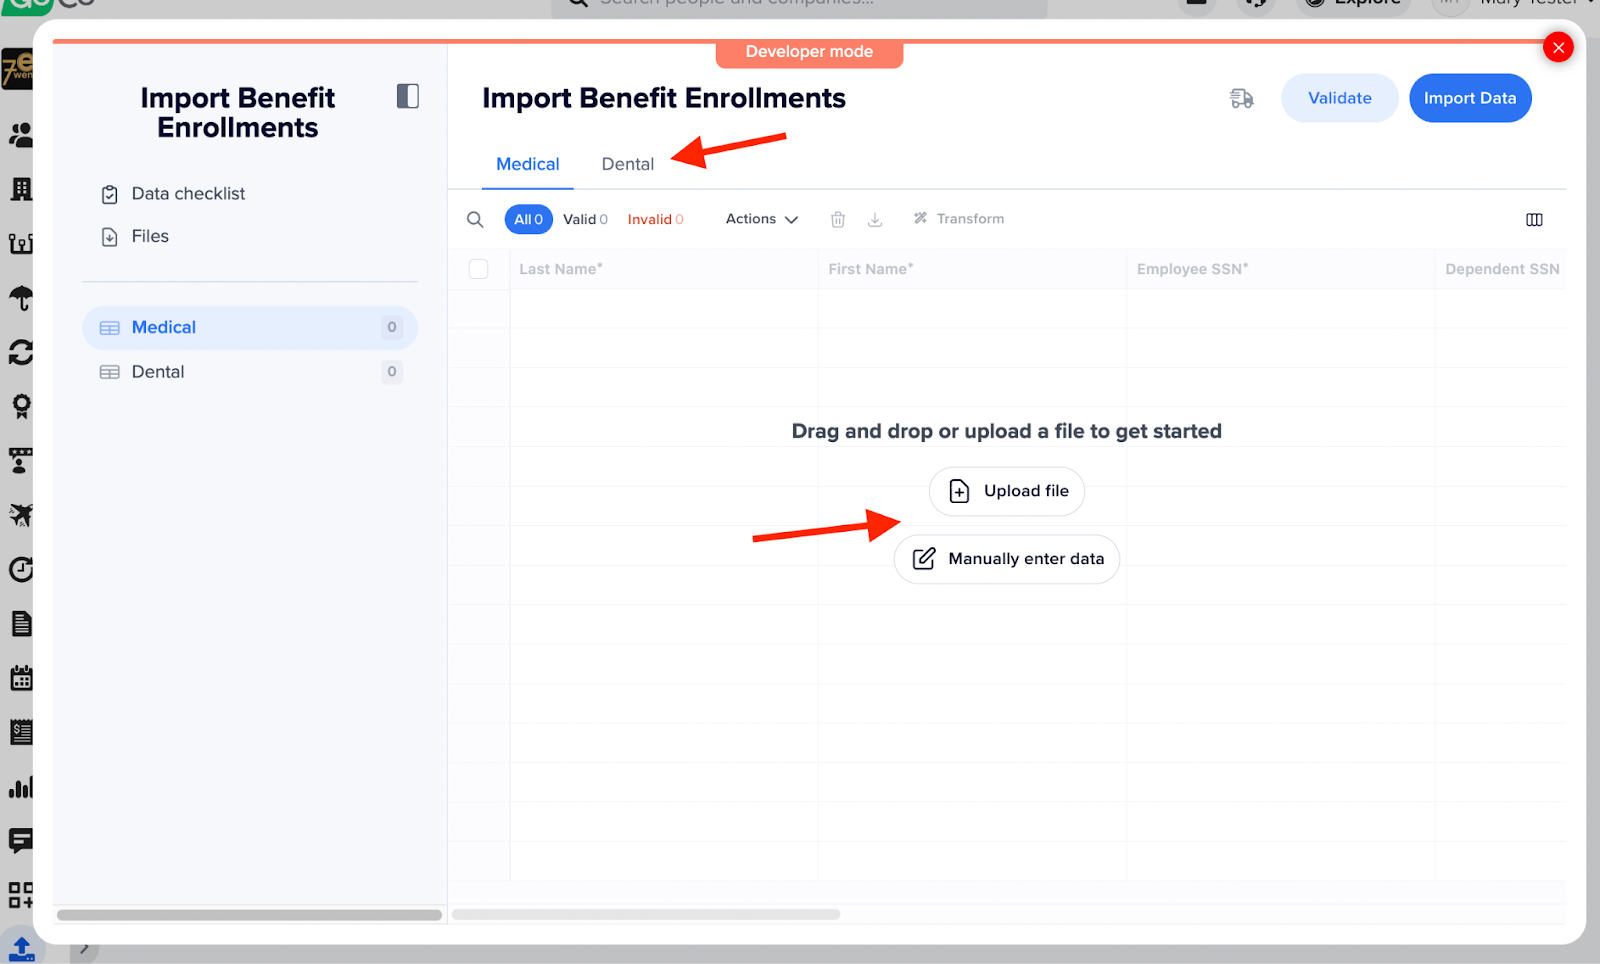
Step 2: Click Setup under Workbook setup and status

Step 3: The workbook will pop up and by default, GoCo will pull the information that we have in the system.
From here you can immediately start plugging in missing information. In other cases, you may have more data that needs to be input, or you want to work off a spreadsheet that has all the data you need; simply clear out all the existing information by selecting all and deleting.
Now you can upload a file or manually enter your teams’ elections.
📌 Tip: You can toggle between policy lines at the top or on the left side
Step 4: Add enrollments!
- If you manually enter the data, make sure to enter the plan name exactly as it appears in GoCo. The numbers on the left side refers to the number of rows of data that appears in each workbook.

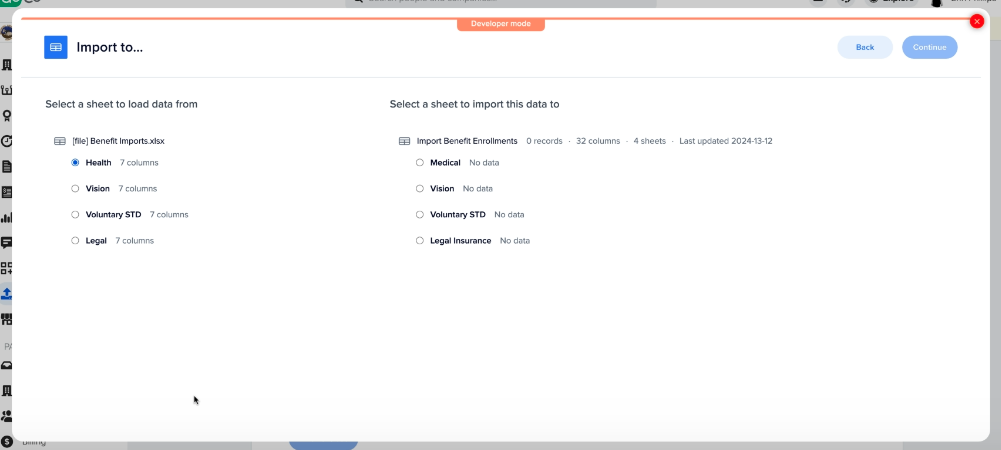
- If you upload the data, you will find your uploaded files in the files tab, select import on your file. This will open up the mapping exercise. If using an Excel template with different tabs of information, the next step of the import will ask you to map which sheet should be mapped to which policy in GoCo.
(Please note that if you are utilizing our import feature, ensure there is no previous data here as this may cause your data to duplicate.)
Note: You can only map one policy at a time.
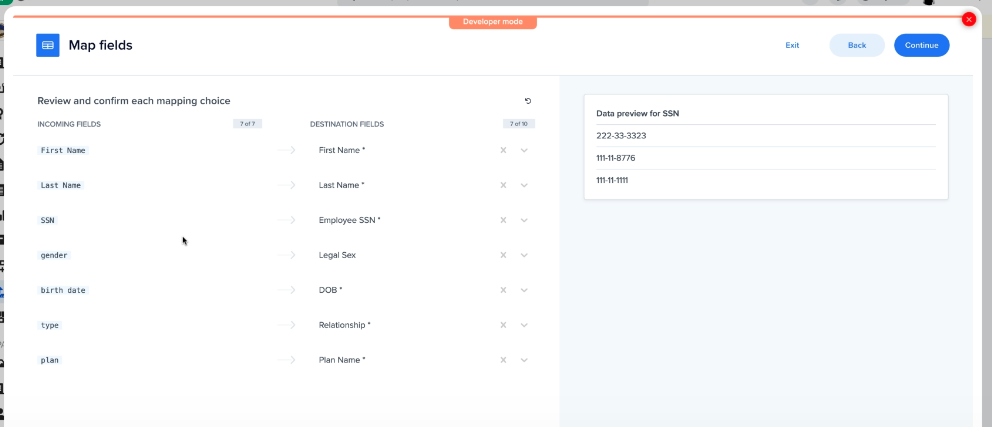
- GoCo will map and match the headers from your spreadsheet. Double-check that all the fields are correct and correspond to the proper header. Select continue when finished. If you have multiple policies repeat this process by selecting import on your file and selecting the next policy to map.
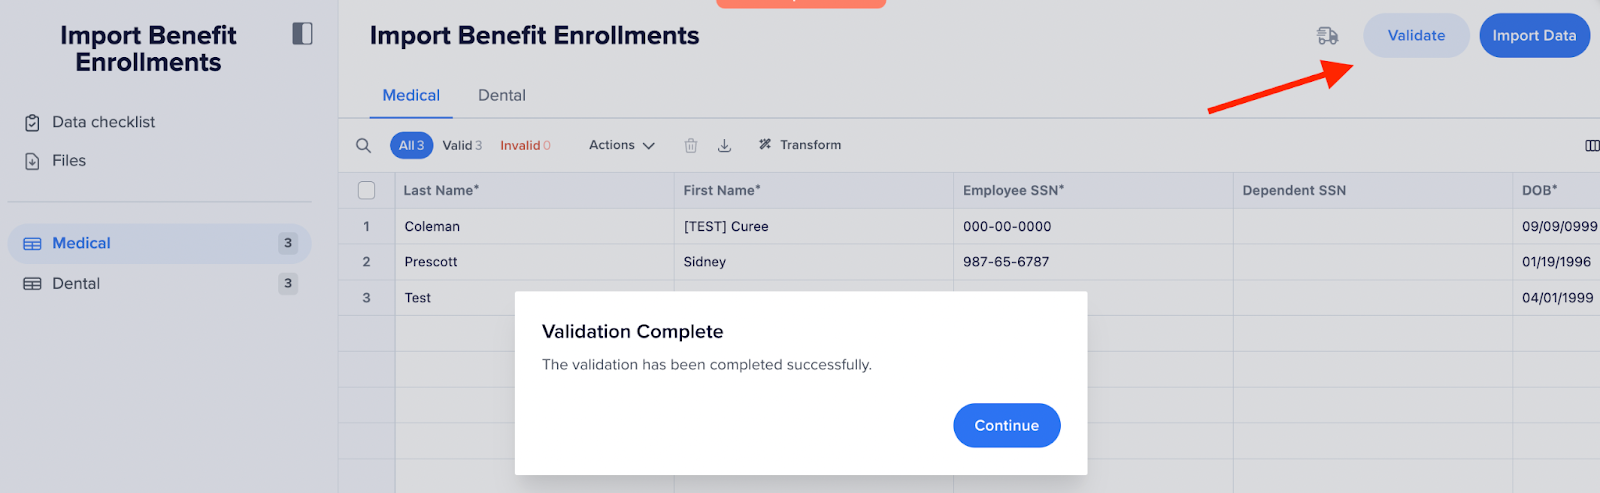
Step 5: Validate your workbook to check for any errors, once complete select "Validate" and you’ll get a popup saying the validation is complete and it’s ready for import!
📌 Tips: Each tab has it's unique valid and invalid identifiers. Filter by selecting the invalid tab and make your adjustments.
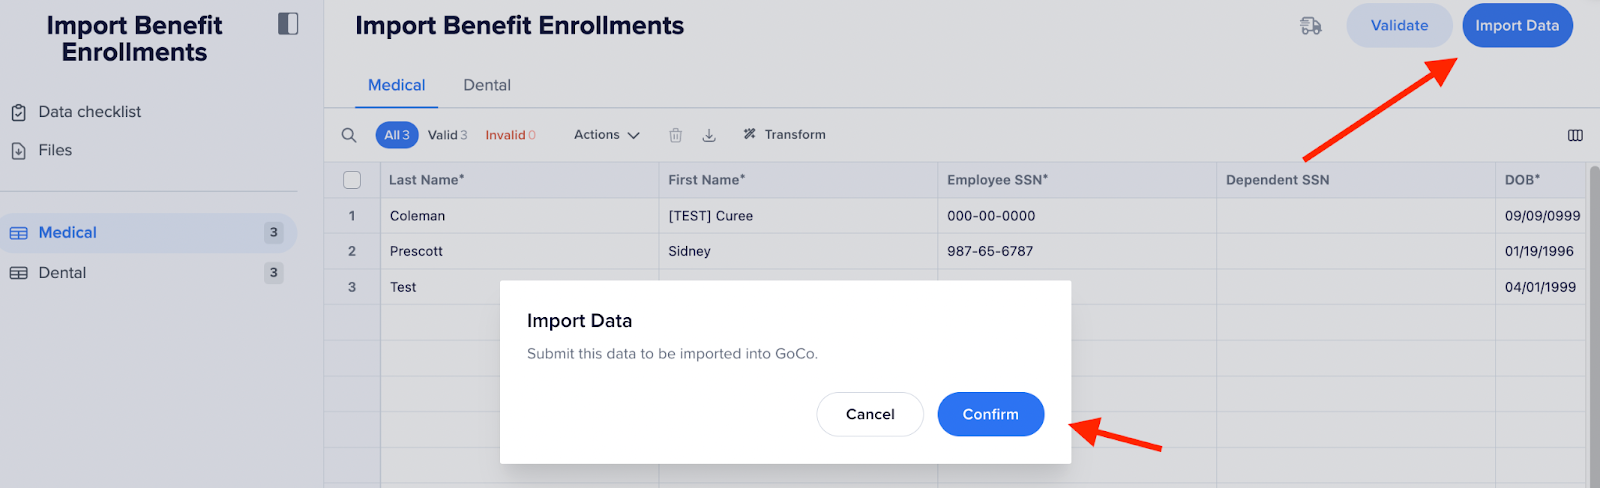
Step 6: Import the Data and click confirm!
These enrollments are always going to be effective on the first day of the plan year you choose when importing (or on their new hire effective date if that falls after the first of the year). It is not a way to update enrollments throughout the year or to add life events.
Crash Course
FAQ’s
- My workbook didn’t load what do I do?
- We would recommend completing one policy line at a time as it may be due to a connection error or timeout.
- I decided I wanted to add another line but I’m halfway through the first policy?
- Unfortunately, you cannot add policies in the workbook once you completed step 2 of clicking Setup. Only remove. To add, you would have to complete the current policy or start over.
- What if I need to navigate to another page and close the workbook?
- Your changes are saved and you may return anytime!
- What if I wanted to filter the invalid fields?
- You can! Select Invalid at the top and it will filter to only those who are causing errors such as missing fields where you can correct or delete those lines
- Can I make mass changes to the columns listed in the workbook?
- Yes you can! Click actions > transform and in the bar at the top of the page you can say things like "update employed to employee" or "change f to female" select the blue Transform Data button and watch the magic happen!
If you have additional questions please reach out to your client success team or email us at support@goco.io 💚