🛠️ Step by Step Guide:
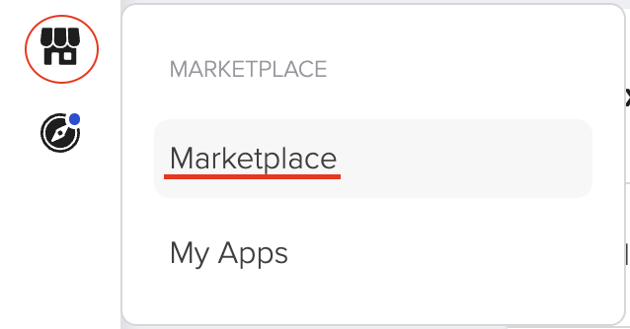
- Click on the "Marketplace" from the left side navigation.
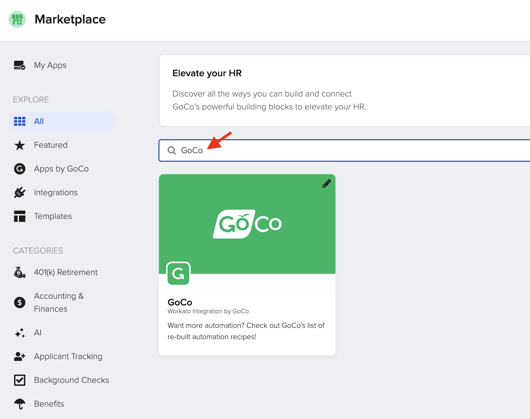
- Search for the "GoCo" app and click on it.
- Look for the template labeled "Employee Birthday, Anniversaries, and Tenure Milestone Notifications" and click "Use this package”.

- Note: Three recipes and one data table will be installed.
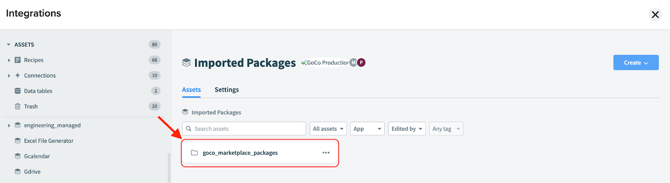
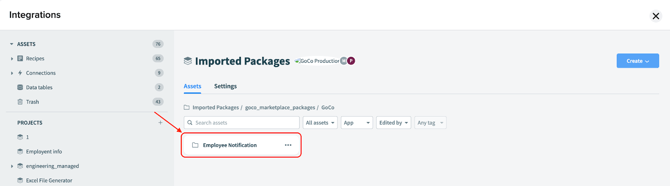
- Click the “goco_marketplace_packages” folder.
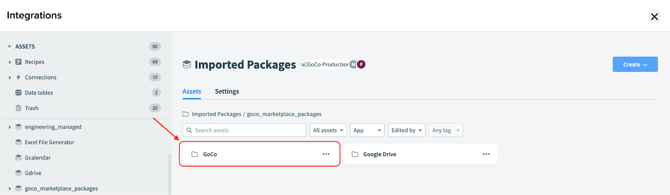
- Then, click the “GoCo” folder.
- Then, open the “Employee Notification” folder.
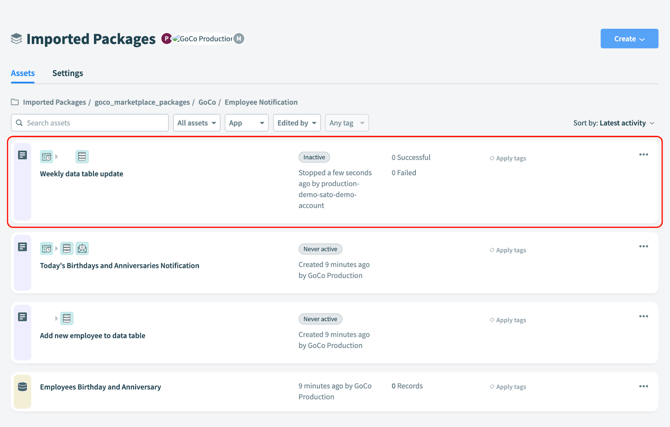
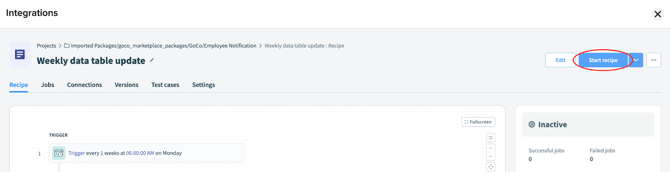
- Click on the recipe “Weekly data table update”
- Click on the downward blue arrow button next to “Start recipe” and select “Test recipe” to populate the data table with the employees anniversaries dates

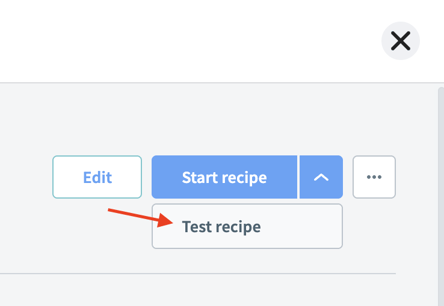
- Click on “Start recipe” to activate this recipe which will update the data table weekly with the employees birthday and anniversaries dates
- Click on “Imported Packages/goco_marketplace_packages/GoCo/Employee Notification” to go back to the recipes page.

- Click on the recipe “Add new employee to data table”.
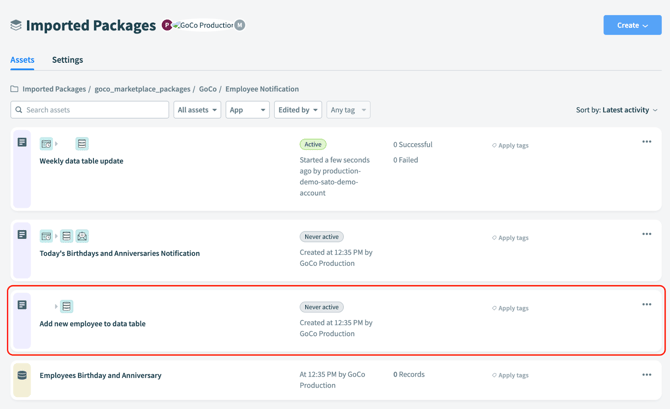
- Click the “Start recipe” button, then go back to the previous page.

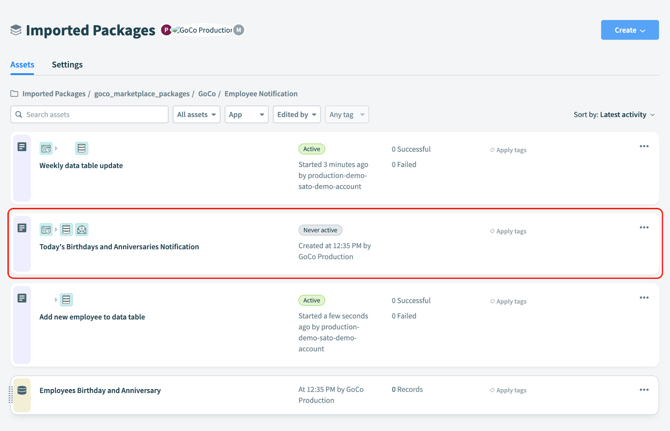
- Click on the recipe “Today's Birthdays and Anniversaries Notification”.
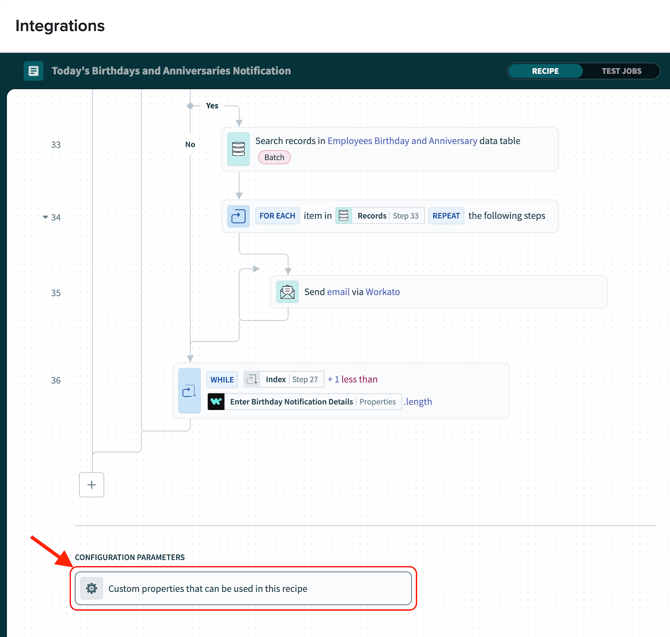
- Click on “Edit” at the top right of the screen.

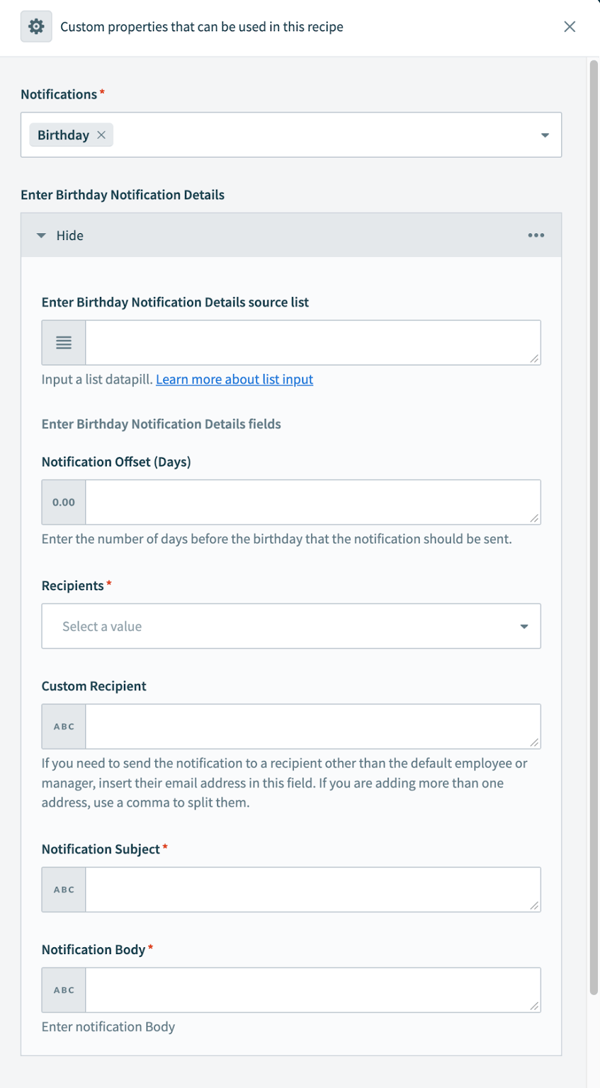
- Once the recipe is open to add the birthday, anniversaries and milestones notifications, select the “Custom properties that can be used in this recipe” under the “Configuration Parameters” at the bottom of the page..
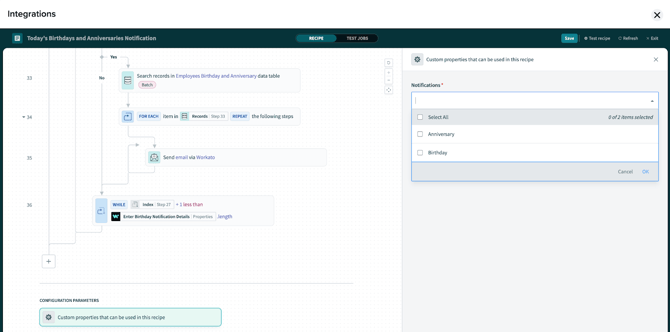
- On the right side panel, select the desired notifications: Birthday and Anniversary
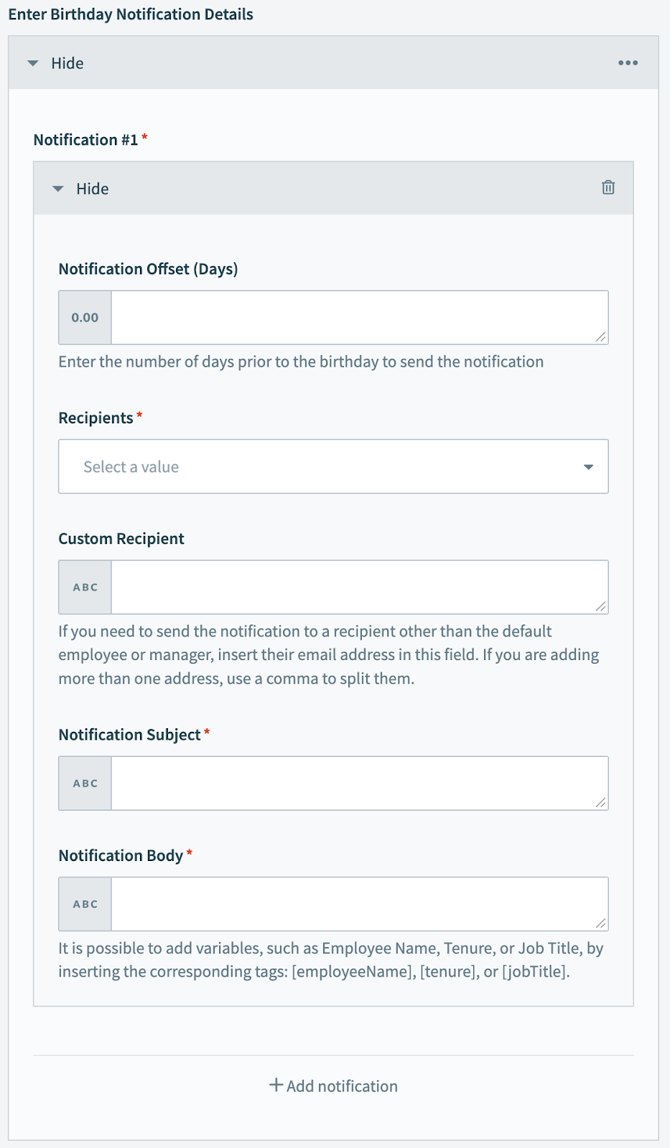
- For birthdays, click on “Add notification”.

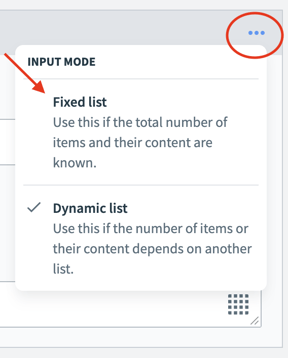
- If the “Add notification” isn’t being shown and the list looks like the image below
- Click on the three dots on the top right of the window and select the option” Fixed list”.

- If the “Add notification” isn’t being shown and the list looks like the image below
- Notification Configuration
- Set the Offset: Enter the number of days prior to the birthday to send the notification. If it should be sent on the day, leave this field blank.
- Choose the recipients: The default recipients are Employee and Manager. If any custom recipient is desired, add their email address (they will be included along with the employee or manager), otherwise, leave the field blank.
- Design the message: Add the notification Subject and Body. It is possible to add variables, such as Employee Name, Tenure, or Job Title, by inserting the corresponding tags: [employeeName], [tenure], or [jobTitle].
- Multiple notifications: It is possible to add multiple separate birthday notifications simply by clicking the + Add Notification. For example, one notification can be sent to the Manager and another to the Employee.
- For anniversaries notification, select the notification type Anniversary Notification and/or Tenure Milestone Notification.
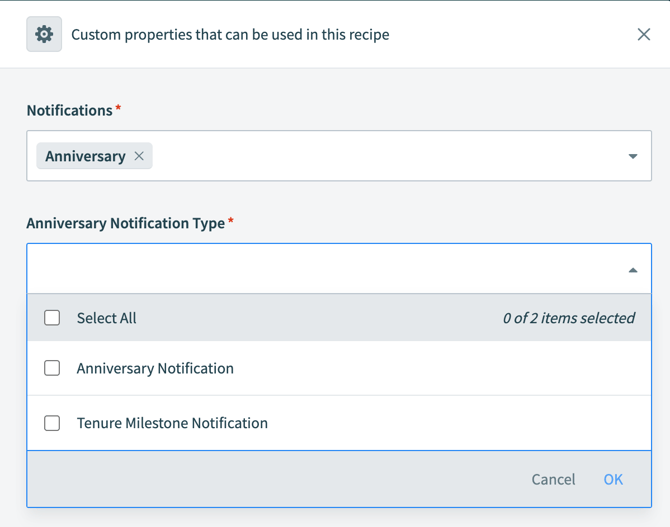
- To set the Anniversary Notification it is quite similar to the Birthday Notification
- Set the Offset: Enter the number of days prior to the birthday to send the notification. If it should be sent on the day, leave this field blank.
- Choose the recipients: The default recipients are Employee and Manager. If any custom recipient is desired, add their email address (they will be included along with the employee or manager), otherwise, leave the field blank.
- Design the message: Add the notification Subject and Body. It is possible to add variables, such as Employee Name, Tenure, or Job Title, by inserting the corresponding tags: [employeeName], [tenure], or [jobTitle].
- Multiple notifications: It is possible to add multiple separate birthday notifications simply by clicking the + Add Notification. For example, one notification can be sent to the Manager and another to the Employee.

- If the notification block isn’t equal to the image above, click on the three dots and select the fixed list option.
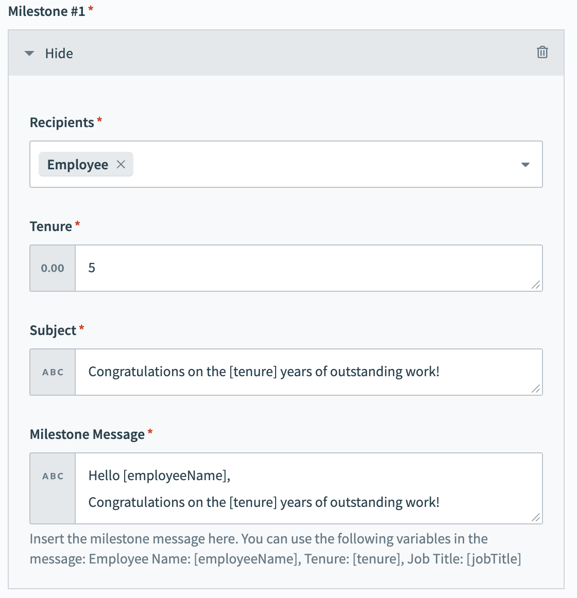
- To set up the milestone notification, select the recipients (the manager, the employee, or both).
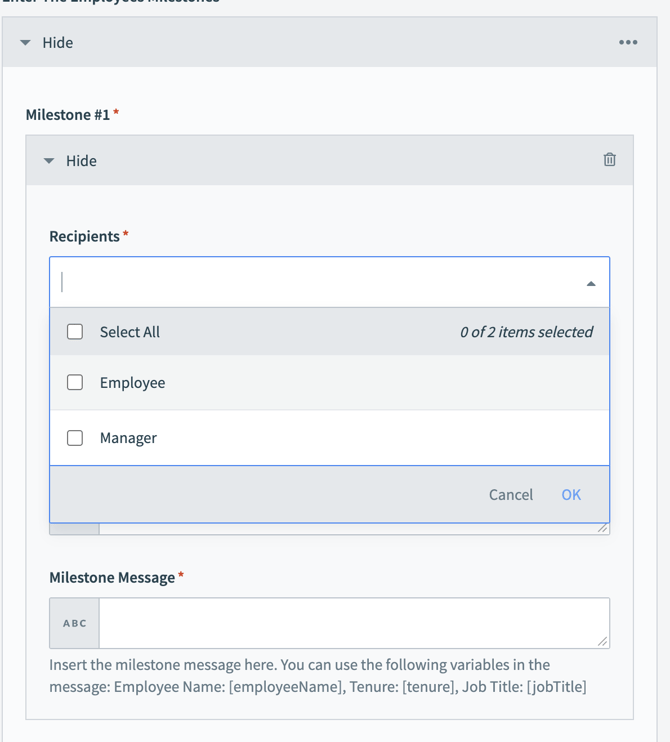
- Specify the tenure (e.g., 5 years) that will trigger the notification for all employees reaching that milestone. Finally, set the Subject and message body, where you can include the variables: Employee Name, Tenure, and Job Title.
- To add more milestones notifications click on “+ Add milestone” below the milestones block.

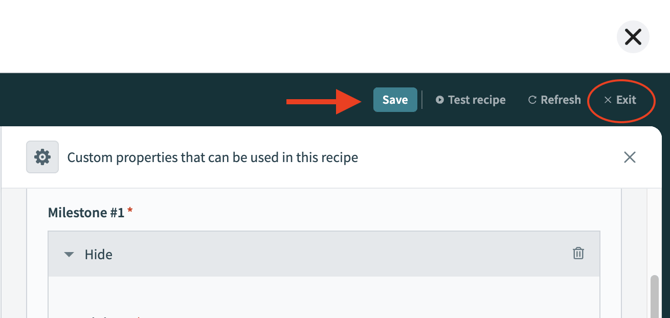
- After the notifications are set, click on the “Save” button in the top-right corner of the page and then click “Exit”.
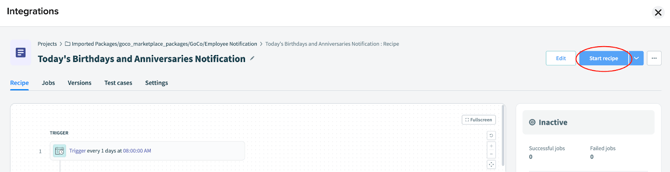
- Last but not least! To finish the setup click on “Start recipe”.
- Done! The Employee Notifications are set, and they will be triggered for any employee reaching the desired milestones. 🎉
To edit the recipe to add more notifications or make changes, it is necessary to click on “Stop recipe”, once the recipe is stopped, click on Edit and proceed through step 15.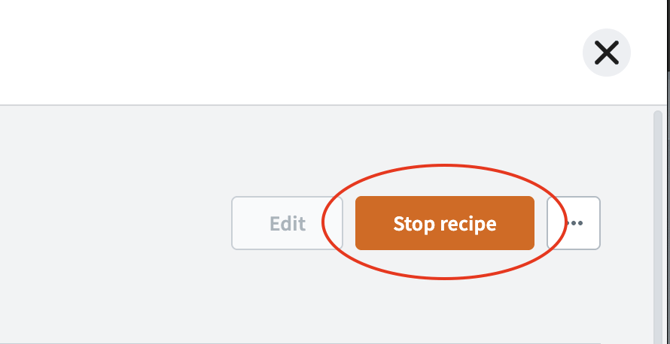
If you have additional questions please contact support@goco.io